FINISHED! Coco in a spotty ponte

My eldest Oliver has piano just near Addicted to Fabric on a Saturday for half an hour, which is just the perfect amount of time for a quick dash in for thread or zippers or needles and to see what new fabric there is.  Last week on such a dash for needles I came across this luscious Italian Ponte: ever so slightly ribbed (very very thin), navy (yes!) and with spots.  Well, there wasn't any way I was leaving that behind and I knew that Tilly's new pattern, Coco, which had been swimming around in my subconscious was going to be bought just as soon as we got home. And so it was bought.
I stuck the pattern together on Thursday night, cut it out and sewed it up a bit on Friday and finished it on Saturday.  I made the funnel neck top version as I only had 1.2 metres, though this would look great as the dress option.  Ben keeps asking me to make more as he adores this make on me and was just suggesting this afternoon the different colourways I could have! I'd love to make one with a slightly bigger funnel or maybe the next make will be the boat neck version.
I cut out a straight size 2 and it fits like a glove.  More fitted than I thought it would be but it is very flattering. The instructions are for a normal machine, so I just went with that instead of sewing straight up on my overlocker, using the stretch stitch on my machine rather than the zig zag stitch for the sides.  I used the zigzag stitch for securing the funnel seam and the cuff seam though. All the seams are then pressed open so it has a fabulous 'flat' feeling on the sides. Love this!
I used the overlocker to tidy up all the seams - though of course it wasn't necessary but it's just felt more finished somehow. 
There isn't really much else to say on this. I took my time, even though it was relatively simple and I really like the results.  The pattern is lovely, it is so comfy to wear and that ponte is just so divine I might need to buy more! Tilly is having a Coco Party on the 21st March.  Are you joining in?


FINISHED! The Draping Chandeliers Dress

Do you remember when I became obsessed with this fabric? Well, I ended up buying it despite it being way above my skill level. My original intention was to make either this Pattern Runway or this Burda dress.  I even went as far as to muslin the Burda.  I might do another post on that dress. Anyway, I like those styles. Short but with sleeves.  Arm coverup!  Anyway, when the fabric arrived, I just didn't feel that style was right and felt that those hanging chandeliers needed a longer dress. I had been a bit stingy and bought less than 2 metres so thought I'd go with tried and true dress.. the Drape Dress from the best named sewing book ever "She has a mannish Style". Easily my favourite of all the Japanese sewing books I own.  This dress takes no fabric so I thought I was on a winner.  I have made this dress before, here and here.  The difference though is that those dresses were in a slightly stretch fabric and shorter.
These photos are a study in why I should only photograph in the morning.  I look tired. And I was. But I wanted to see what the dress looked like on.

I will say that I am happy with my cutting - my chandeliers hang straight - especially at the back where it really counts. I tried to get the placement of the 'busy' part of the chandeliers in a drop waist position, however with this aspect I'm not convinced it turned out exactly right, perhaps I could take a bit more length off it. The dress is much tighter than previous versions, the fabric obviously doesn't stretch, but I also decided to french seam the sides which meant I lost a bit on the sides.  
The fabric is just so beautiful, but I'm not sure about the dress.  I was going to wear it to a wedding tomorrow but have decided on an a different hand made one because I just don't feel great in this one. I need to think about it a bit more and consider what next with it. 
For now, I'm making up a Coco and considering hitting the buy button on some fabric for another Kanerva.  I love that top more and more with every wear. 

FINSHED! A bejeweled Kanerva

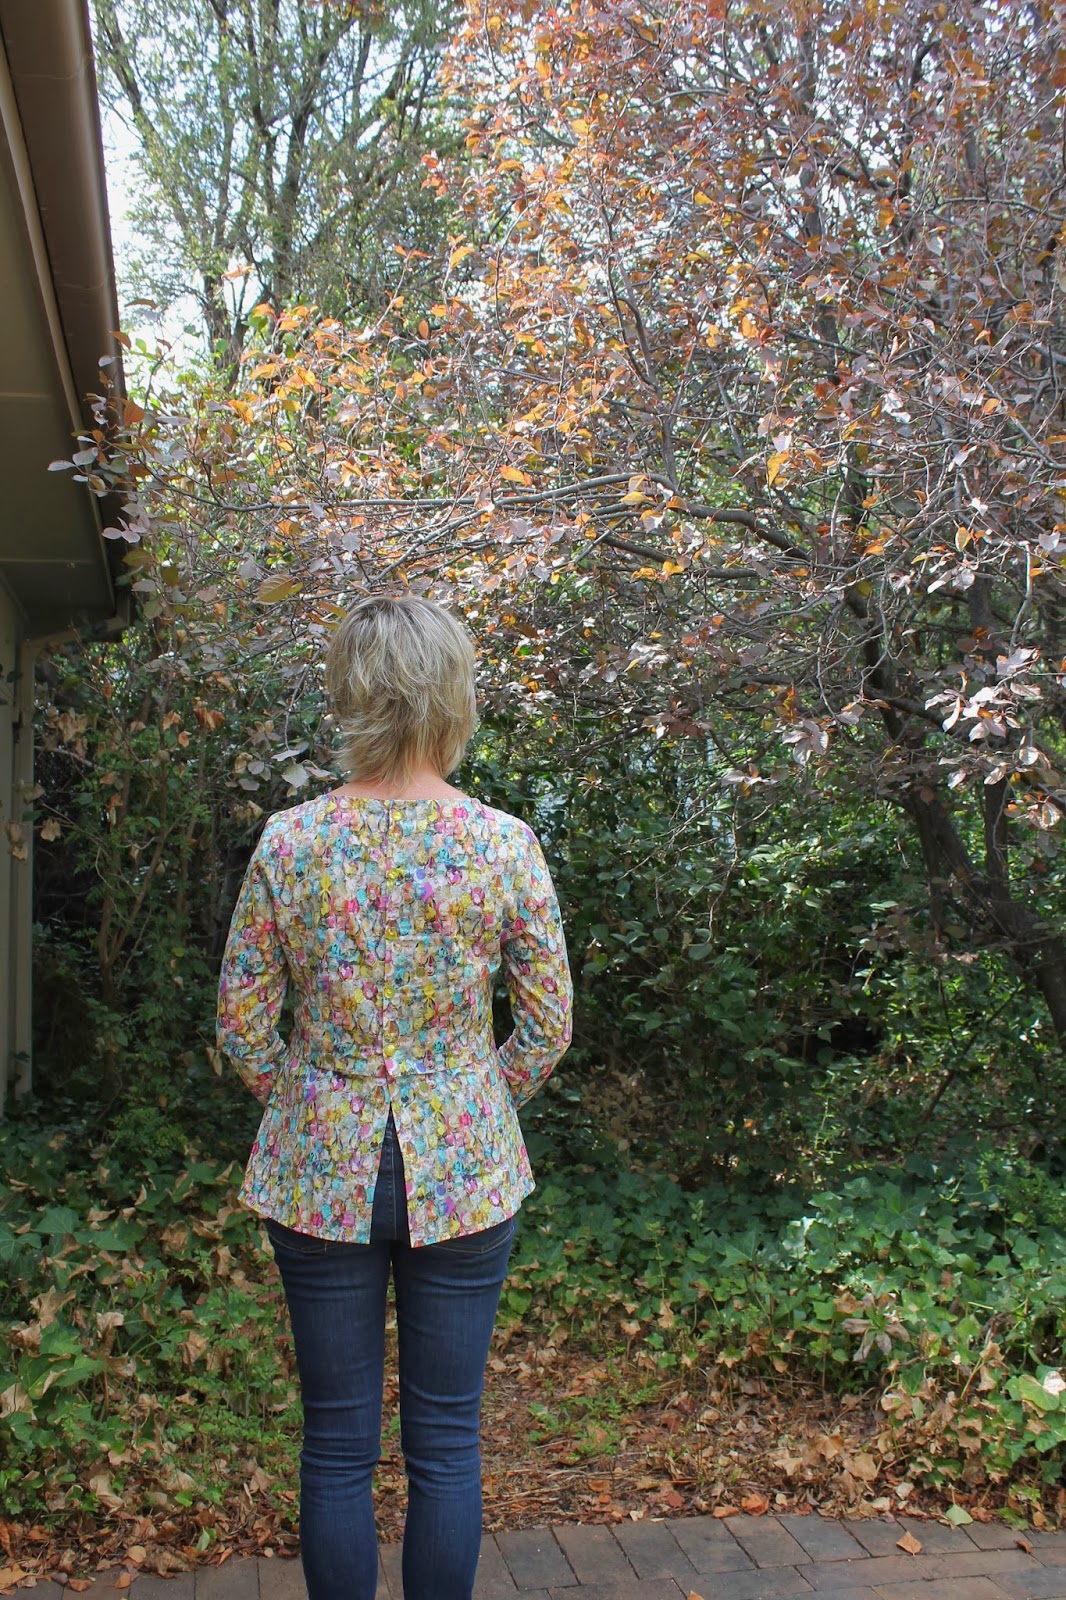
I love this make.  I really really love it.  (So sorry for the many photos to follow). Do you have clothes that just make you feel great and seem to give you a whole new attitude or is this just me!? So much so, that as soon as I finished it I wore it to the supermarket on Sunday with my Iris shorts. Then I wore it to work on Monday tucked into a skirt (and my gold pour la victoire shoes - nothing like blinging it up for work!) and I'm planning on wearing it on Wednesday night with my jeans for dinner with some friends. Who'd have thought there'd be so much versatility from such an over the top print. And this is probably the most over the top print I own (and in a wardrobe of prints that is saying something!). 
So, first thing, the print. A couple of weeks ago I saw this liberty print on Lizzy House's instagram and I fell in love. I'm not sure how I missed it til now. I immediately bought 1.5 from Shaukat (not realising that it is available at Addicted to Fabric!). Check out the Elisalex Diana did in a different colourway!

The print is Alexandra C, from the Liberty Art Fabrics Collection SS 14,  Gallery of Prints collection by Liberty Art Fabrics.  

A photographic print – the Alexandra fabric design represents the glittering jewels of Liberty’s decadent Jewellery Room.  The Street Level fabric story celebrates Liberty’s eclectic ground floor accessories. Each design pays homage to a different area or department, taking on the intrinsic mood of each individual space. 


The next thing that happened was that I saw Rachel's blouse from week 2 of Project Sewn,  I fell in love with it and popped over to the Named Clothing website to check out the pattern, the Kanerva button back shirt. Et voila, the perfect pattern for the Alexandra fabric.
This was my first time sewing a Named Clothing pattern and it was really enjoyable.  I have read that they have made loads of changes since their first pattern range and it shows.  The pattern is pdf but still required tracing (a bit annoying) but it wasn't too onerous as there aren't many parts to this pattern.  The instructions were clear and well stepped out. I love the construction and the way that the peplum has a little fold. 
The neckline is finished with binding, I prefer a facing but no big deal. The instructions suggested the back placket is done and then the neck and hem although I switched this around. I cut a straight 36 but removed an inch from the length above the waist to ensure the peplum sat at a better spot for me.  Otherwise the fit is good. 
The pattern fabric suggestion is: "Prefer an elastic, light or medium weight fabric, so the shirt is easy to put on without opening the buttons". In hindsight I'm not sure whether this means that it should be only a knit fabric and not a woven, but I went with the Liberty tana lawn and despite thinking right up until the last minute that I would need a team of dressers to be able to get into it, it does slip over the head. Not so easily that I would consider forgoing the button up back, but easily enough. 
I had a really great time on Saturday meeting up with a great bunch of Canberra sewers: Jen, Myra, Siobhan, Kylie and Amanda. Jen suggested that wooden buttons might look good and she is right they would look great but I was carried away with the opulence of the print and went for some very bling, yellow buttons that almost look like they could have popped out of the print. 
I think this style is just so flattering and I love that it is so versatile that it can be easily tucked into a skirt or pants. There will definitely be more than one of these in my wardrobe. It really is a fantastic shirt pattern.