Showing posts with label named. Show all posts

FINISHED! A seersucker two piece setacular

For Christmas I received 2 metres of Japanese blue checked seersucker from Tessuti from my sister! Such a great present! I debated about what to make, I had seen so many gorgeous Annie dresses and other maxi dresses using this fabric on Instagram, but decided on the Esther shorts and then quickly after, a matching top to wear for NYE.  

Honourable mention firstly, to my first pair of Esther shorts made out of rayon (viscose) ottomon suiting from Spotlight. I initially saw the fabric as some amazing pants on Kat and then the fabric was kindly enabled by an instagram moment by Lizzy, who picked up some for Amanda and myself.
So these shorts are ok but they are too big. Easily at least a size too big in the waist and bagging in the butt. I still wear them because they are comfy and because the flowers are super - but they aren't the magic shorts that I had envisioned. A wearable muslin if you will. 
So newly armed with a better sense of sizing I cut into the seeksucker. This time I went down a half size in the waist and used the darts for a 6 in the butt.  I think I need to go down a tad more in the waist.

I added an inch to the original length of the shorts, but looking at these photos the shorts could probably be shorter. I have higher shoes which I had planned to wear with this outfit but I left them at work over the holidays (my drawer has a few pairs of shoes in it as I tend to race into work in sneakers some days!).
After finishing the shorts I realised I had just enough fabric left over to make a matching top. Thank goodness!  I turned to my trusty Kanerva which has served me well over and over. It wasn't the plainest sailing - those sleeves for some reason were a nightmare to get in and I wasted time putting the back and front darts in only to pull them out as the top didn't sit as well as I wanted it to with them in.. but I just adore the top and especially with the shorts.  I love the curved hem. 
I've left some blooper shots in as my oldest boy was sitting in the loungeroom pulling some blue steel faces as me as I took theses photos. 

So while technically this is a 2015 make, I'm calling it the first #woohoomake of 2016. I wore it NYE, then washed it and wore it yesterday. I'm years late to the setacular party but I'm here. May there be many more #woohoomakes this year.
 

FINISHED! A named duo

This outfit started out because my best work trousers had a zip that kept falling down (and if I was honest with myself, their best days were gone). Having an aversion to plain black pants, I struggled to find anything that remotely addressed the gaping hole in the wardrobe. The hole still exists... Naturally I still haven't gone anywhere near plain fabric but I decided to try out two new patterns. The Named Alexandria Peg pants and the Sew Over It Ultimate trousers in an attempt to make some pants for the wardrobe. 
I still haven't made up the Sew Over It Utlimate trousers but the pattern is printed and I have some test fabric.  My flamingo pants have been in high rotation now that the weather is warmer so thought I'd start with the Named peg pants.  The allure of the elastic waist band .... and I've had great success with Named patterns in the past. 
The fabric for these pants is a cheapy 'linen' from spotlight that I picked up for the sole purpose of testing these peg pants. The linen wears a bit during the day so by the end of a work day of sitting around, the bottom gets a bit baggy, but it doesn't worry me so much. 
 I can see why these pants have a popular following. The pleats, pocket detail and easy elastic waistband make them a straightforward make with a nice cut. I omitted the drawstring. These pants are comfy and I feel almost guilty wearing them to work as they really are like secret pj's.
To 'match' the pants, I made up a Named Kanerva in another Spotlight purchase of barely stretchy stripey jersey. Oh how I love the Kanerva. It is my favourite top to make up. Without a doubt. This was my first one in a knit so I removed the back buttons. I had also forgotten that I had played around with the peplum for a dress and forgot that I had shortened the bodice so it is sitting a bit high up under my bust - I'll fix this next time.
All in all this is very comfy work attire (is it too comfy ?) and feels a little bit more me than my previous make. Perhaps it's the pattern on pattern that I like. Next up will by another pair of Alexandria peg pants based on this inspirational image that I finished yesterday at CBR sewing crew.

FINISHED! My Frocktails 2014 trompe l'oeil dress

This weekend, Amanda, Jen, Myra and I got on a Murray's Bus and road tripped it to Sydney for Frocktails. A fantastic event organised by Kat, I'm sure there will be lots of links on various blogs as there was simultaneously one in Sydney and one in Melbourne. It was so wonderful to finally meet so many sewing friends in real life.  What did I wear? Well my frock was made out of more magical fabric bought from my recent trip to Spotlight where I picked up fabric for my sister's saunio.  I spent most of yesterday in a mild state of nerves that someone else might be in a dress in this fabric. Two ladies in this fabric would have been difficult to hide. 
Yes, this one is also a 'polycotton' with a dubious mix of 96% polyester 4% spandex. But just look at those colours.  This fabric is fantastic. The colours are vibrant and neon.  At first glance the fabric looks like it should be a tweed, the fabric fooling the eye that it is woven. But no, the fabric is a thick stretch with a lovely 'bobbly' plastic like texture that is hard to not want to stroke. The back of the fabric as you can see is a white/cream. These indoor photos show the colours the best.  Needless to say I couldn't get any good photo indoors at the actual event so these will have to do. 
The dress itself is a Named Kanerva hack.  I've always loved how that top fits me so I thought I'd try making it into a dress with an invisible zip at the back. 
It is a simple shape letting the fabric do all the talking. I would have liked the top to have been slightly snugger but the slightly loser fit in the bodice has it's comfort advantages.
I love the slight A shape to the skirt and the curved hem.  I hemmed it twice worrying the first time that the curve looked odd, but realised after unpicking it that a straight hem wouldn't have allowed the dress to hang right so redid it.
I am such a fan of the higher scoop neck and long sleeve look.  Because the fabric is stretchy and quite thick, the neck is simply turned over and stitched. In order to make sure the neck sit nice and flat I put in some clear elastic...I may have pulled that just a little tight, but hopefully it's not too noticeable.  I particularly like how well I matched the sides and the back zip. Oh of course it's not perfect, but the waistband matches up and the stripes are pretty good. 
All in all, I loved wearing this dress, it felt fun and different and can't wait to pull it out again for a wedding in a few weeks.  Big kisses to all the frocktails gals and to those who would have loved to have been there but couldn't. Til next time xx

FINISHED! A selfless saunio

I have a bit of a nerve parading around here in a cardigan-jacket I made as a present for my sister, but there you go.
This is a loooong overdue birthday present for my sister. I used the Saunio pattern again by Named Clothing, last seen made up in ocean neoprene
I had a trip out to Spotlight a couple of weeks ago for tracing paper and found quite a few 'treasures' like this while I there for tracing paper. This fabric is a strange mix of cotton/polyester/spandex which provides for a fabulously textured and slightly stretchy heavy knit. It is also gentle machine washable and the slight stretch makes it, in my opinion, a perfect 'professional woman who also needs to wrangle children' jacket.
The wonderful design of the crossing over front and the dropped sleeves means that it also super easy to fit for a present. 
Constrution wise, I understiched the large facings to the jacket rather than edge stitched all the front to the facing as the fabric ironed slightly better than the neoprene. I also fixed my problem from my other jacket with the attachment of the facing and hem. So that is heaps neater on this one.
With the jacket I'm wearing an old top from several years ago in Liberty Mike B.  Blogs are all awash with Nani Iro fabric and makes at the moment and Inna and a recent make of hers, reminded of a time when I made and wore a lot of this pattern (Top C) from the Nani Iro pattern book. In fact I think I have 5 of them in my wardrobe with variations (including collars). All of mine are much shorter than the pattern and all have round necks(!).  There is definitely enough of them to do the one week one pattern challenge!


FINISHED! Ocean spray scuba saunio

I made this quick and easy jacket up on the weekend and wore it to work on Monday.  It's another of those makes that makes me laugh a little when I wear it. But first, let's talk about the fabric.  It's Ocean Spray Scuba from Tessuti. I have never sewn with neoprene before and frankly I didn't think I ever would until I became just a little bit fixated on it through makes by Oona, Julie and Debbie. I then saw this fabric pop up on the Tessuti website which I stalk almost daily and it was in my cart with my eye on a jacket before I knew what I was doing. It's Tribute August over at the Sewcialists so this is my tribute to the neoprene lovers, Oona, Debbie and Julie!
I took this photo with the fabric on the line. You can see much better here the actual repeat pattern of the fabric which was difficult to see online. The colours were also more vivid than my computer displayed. 
I'm sure there are a lot of people who will be making a gorgeous shift dress or the like with this fabric. It certainly deserves to be showcased. Both my mum and Ben thought I should make a dress, but I was a bit frightened off by the boldness of the pattern.  I couldn't work out where to place it and found it a bit bright for my usual style. I was already out of my comfort zone with this print and with the neoprene, so perhaps I should have just kept going, but I had bought it to make a jacket so after quite a bit of too-ing and fro-ing decided to stick with my original idea of the jacket. 
I used the Saunio cardigan from Named Clothing pattern. It was my first time making up this pattern, but I have enjoyed my experiences with Named patterns and this one sewed up nicely. The only change I'd make next time would be to neaten where the facing meets the bottom edge as the facing is shorter than the front and so you are supposed to turn it up where it might be nicer to turn it under somehow.  Looking at the pictures it could perhaps be a bit shorter, but that is deceiving as the front hangs down because of the way the front crosses over.
I'm not sure I'm a neoprene sewing convert.  It doesn't iron well so I had to do a bit of top stitching with my walking foot where I wouldn't normally: firstly around the sleeve seam and then all the way along the front and the collar. Normally I would have just understitched here but there was no way the facings were going to stay under without it.  The style of cardi/jacket means that quite often it flips out so it's good to have the facings there.  I had studied a RTW neoprene dress at the shops over the weekend and noticed that they simply cut the armhole and the bottom without hemming it. I contemplated this, but in reality this neoprene is just bit thicker than ponte so it felt a bit slack not to hem. I used a twin needle with the hem turned up once and it worked perfectly.  I didn't bother overlocking the seams.  It does have good body to it which suits this jacket well.
All in all I like how this turned out. It's not exactly me, but I am so glad I made it into a jacket as I prefer the bits of pattern that I used, especially on the sleeve seam where there is light and dark. I wore it to work on Monday and I admit to feeling just a little bit over the top in it, but I enjoyed wearing it. I like the Named Saunio pattern: the dropped shoulders and 3/4 tapered sleeves. It won't be the last time I make this pattern up.
As for neoprene, I've probably done my neoprene now. But never say never. What about you? Are you dipping into the neoprene craze? Are you participating in Tribute August?

FINISHED! A Kanerva for the Liberty Atrium

It feels good to have a new blouse for the wardrobe. I've had this on the go for a few weeks, interspersed with holidays and my machines being away, but I finally finished it on the weekend. Yes, its another Named pattern Kanerva. It isn't often that I sew the same pattern up more than once, but I am a big fan of this pattern. A big fan. I just love the fit and while a more simple fabric would show the design lines, I do love it in crazy Liberty prints. 
This time I made it up in Liberty Atrium C, which is from the Liberty Art Fabrics SS 14, Gallery of Prints collection.

Based on an illustrative design from 1972 with a 1920s feel, The Atrium fabric print represents Liberty’s iconic Central Atrium space on the Ground Floor.

The Street Level fabric story celebrates Liberty’s eclectic ground floor accessories. Each design pays homage to a different area or department, taking on the intrinsic mood of each individual space.


I love the 1920s feel of this design and bought this fabric in the blue colourway as well as I wasn't sure from the internet photos which one I would like.  I found the blue to be way too washed out for me but I love the autumn colours of this one.  

The only change I made from the last one, was to interface the button plackets with a heavier interfacing as I found the lighter weight one on my other Kanerva is a bit too light and there is a tendency for the plucket to go a bit out of shape during/after a wear. 
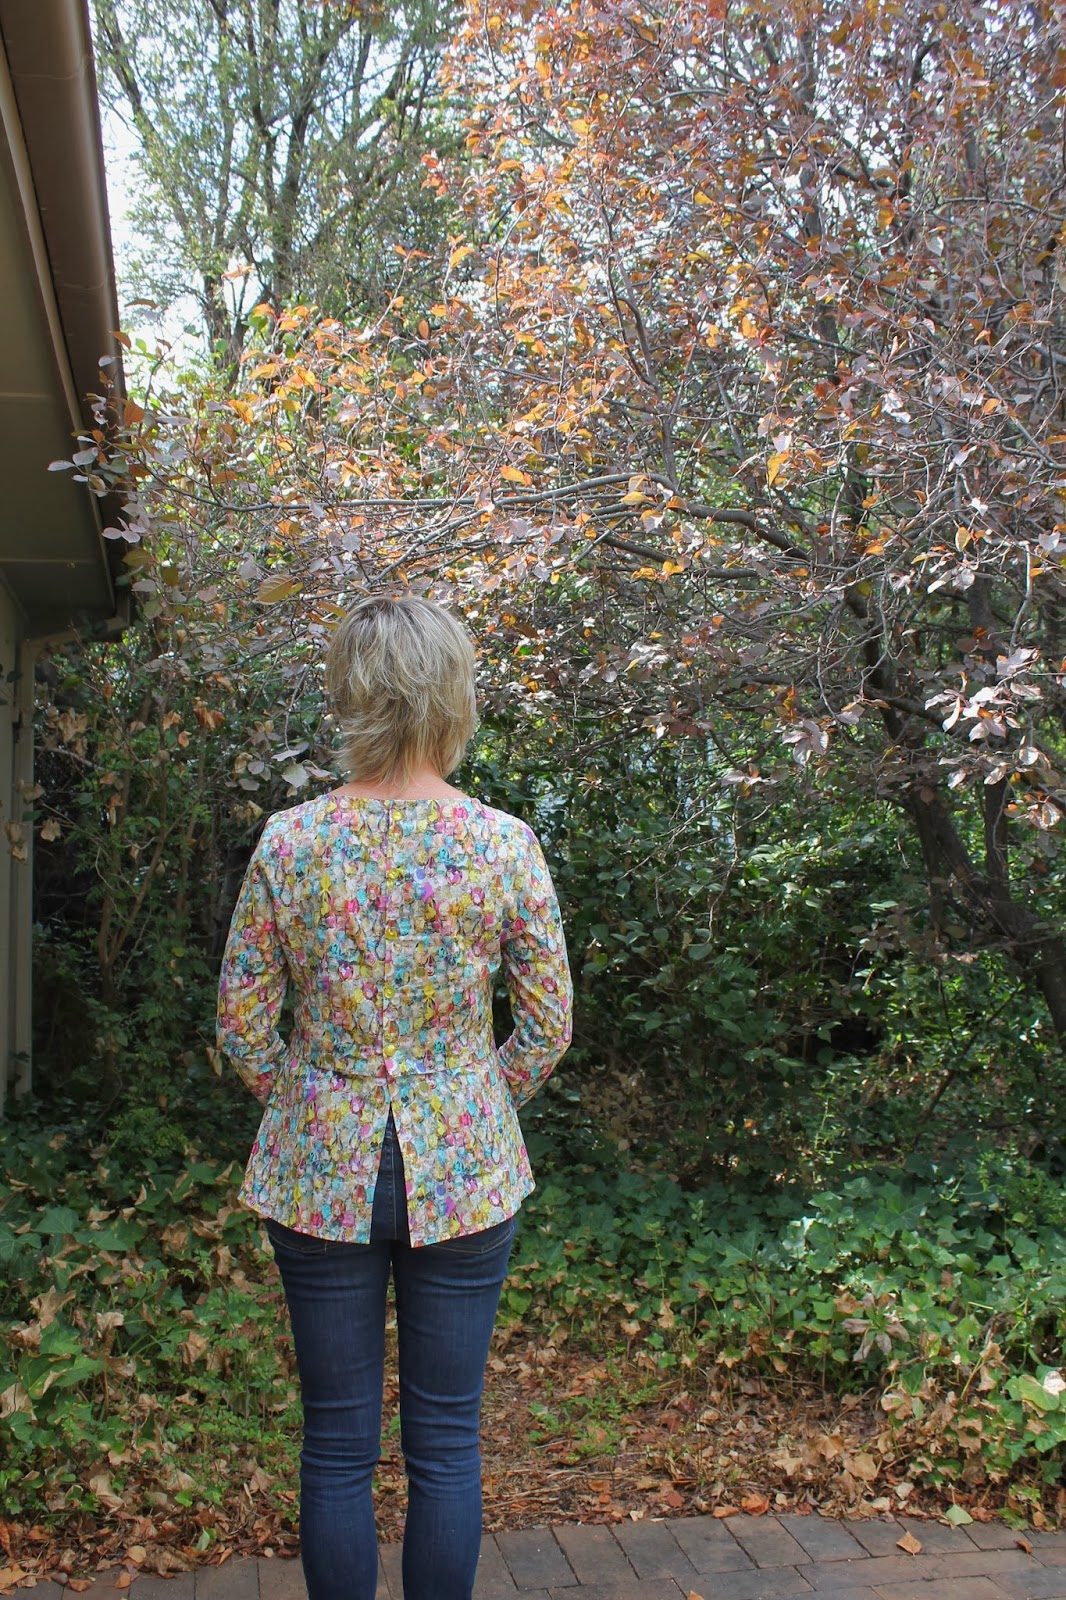
So, a new blouse to add to the Me Made May rotation! Sadly, I've fallen off the wagon a bit in terms of documentation as I spent last week at FashFest covering the fashions for The Canberran, but I have been wearing me mades every day and keen to catchup and dive into the flickr pool. 

FINSHED! A bejeweled Kanerva

I love this make.  I really really love it.  (So sorry for the many photos to follow). Do you have clothes that just make you feel great and seem to give you a whole new attitude or is this just me!? So much so, that as soon as I finished it I wore it to the supermarket on Sunday with my Iris shorts. Then I wore it to work on Monday tucked into a skirt (and my gold pour la victoire shoes - nothing like blinging it up for work!) and I'm planning on wearing it on Wednesday night with my jeans for dinner with some friends. Who'd have thought there'd be so much versatility from such an over the top print. And this is probably the most over the top print I own (and in a wardrobe of prints that is saying something!). 
So, first thing, the print. A couple of weeks ago I saw this liberty print on Lizzy House's instagram and I fell in love. I'm not sure how I missed it til now. I immediately bought 1.5 from Shaukat (not realising that it is available at Addicted to Fabric!). Check out the Elisalex Diana did in a different colourway!

The print is Alexandra C, from the Liberty Art Fabrics Collection SS 14,  Gallery of Prints collection by Liberty Art Fabrics.  

A photographic print – the Alexandra fabric design represents the glittering jewels of Liberty’s decadent Jewellery Room.  The Street Level fabric story celebrates Liberty’s eclectic ground floor accessories. Each design pays homage to a different area or department, taking on the intrinsic mood of each individual space. 


The next thing that happened was that I saw Rachel's blouse from week 2 of Project Sewn,  I fell in love with it and popped over to the Named Clothing website to check out the pattern, the Kanerva button back shirt. Et voila, the perfect pattern for the Alexandra fabric.
This was my first time sewing a Named Clothing pattern and it was really enjoyable.  I have read that they have made loads of changes since their first pattern range and it shows.  The pattern is pdf but still required tracing (a bit annoying) but it wasn't too onerous as there aren't many parts to this pattern.  The instructions were clear and well stepped out. I love the construction and the way that the peplum has a little fold. 
The neckline is finished with binding, I prefer a facing but no big deal. The instructions suggested the back placket is done and then the neck and hem although I switched this around. I cut a straight 36 but removed an inch from the length above the waist to ensure the peplum sat at a better spot for me.  Otherwise the fit is good. 
The pattern fabric suggestion is: "Prefer an elastic, light or medium weight fabric, so the shirt is easy to put on without opening the buttons". In hindsight I'm not sure whether this means that it should be only a knit fabric and not a woven, but I went with the Liberty tana lawn and despite thinking right up until the last minute that I would need a team of dressers to be able to get into it, it does slip over the head. Not so easily that I would consider forgoing the button up back, but easily enough. 
I had a really great time on Saturday meeting up with a great bunch of Canberra sewers: Jen, Myra, Siobhan, Kylie and Amanda. Jen suggested that wooden buttons might look good and she is right they would look great but I was carried away with the opulence of the print and went for some very bling, yellow buttons that almost look like they could have popped out of the print. 
I think this style is just so flattering and I love that it is so versatile that it can be easily tucked into a skirt or pants. There will definitely be more than one of these in my wardrobe. It really is a fantastic shirt pattern.