Showing posts with label finished outfit me 2014. Show all posts

FINISHED! Eliana and Kevin

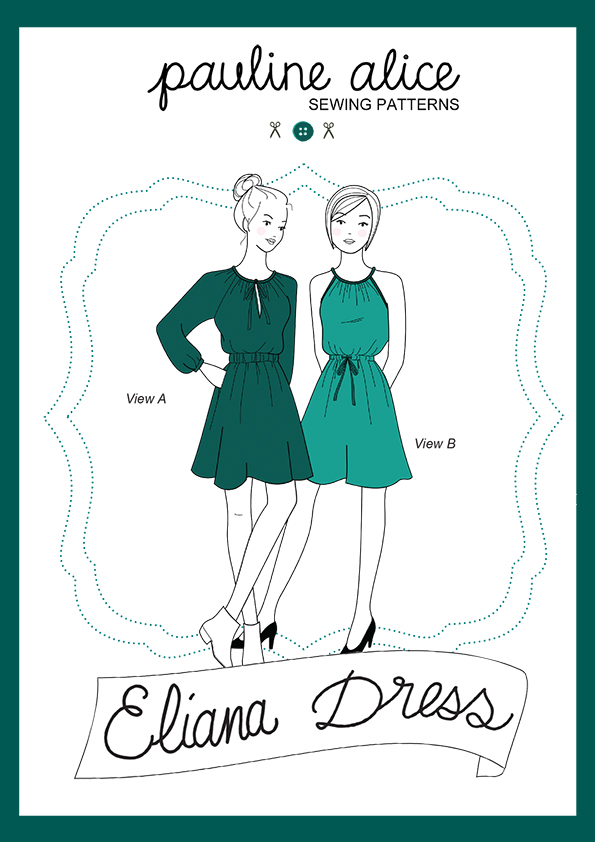
Today, I get to talk about a dress I made all the way back in October as a pattern test for Pauline Alice. You all know that I am a fan of Pauline's patterns and so when the opportunity to test a new one comes up, I jump at it.  This one is her new Eliana dress.  A wonderful, raglan cut dress with two options, one with sleeves and the other - a very flattering summery version. You can see a super summery version over at Lizzie's.
But, first it's made from Liberty of London fabric, so lets quickly talk about the fabric.  As usual with me, I threw caution to the wind and used a Liberty that was in my stash. High risk testing! The design is Kevin (colourway B) from the Liberty Art Fabrics Collection Autumn Winter 2014.  I have fancied this fabric for a while and ended up buying it from Shaukat back in August 2014. It sat in my stash for a little time until I was asked to pattern test the Eliana dress. Inspiration.
Liberty Art Fabrics Kevin Tana Lawn
Fabric Story:
Kevin Liberty fabric was based on the celestial ceiling art in the hallway at Mount Stuart in Scotland. The constellations in the print were hand drawn in white and grey chalks on black paper to create a conversational starry night.

There is something about wearing this fabric that makes me want to pull out the latest trash magazine and read my horoscope!
Anyway, now to the important part, the dress.  The dress comes in two versions, the one I tested has a gathered neck tied with binding, an elastic waist and raglan sleeves.  I love a short dress with long sleeves, even in summer, so the choice for me was obvious!  I think that it would be trivial to replace the elastic waist with the ribbon tie which is used in the summery version.  Of course raglan sleeves provide such an opportunity for colour blocking.  And for pocket lovers, there are pockets!
As this was a test version I had a few adjustments to make with the length of the bodice and sleeves. I finished making it according to the instructions, but then found that the neck was too wide for my liking and that the sleeves hung too low due to the raglan design.  Before my next wear, I unpicked the binding collar, regathered and re sewed. I think these adjustments have been reflected in the pattern and this small change made this a much better fit for me. The photo above was taken before I redid the neck.
I really like this dress and before coming on holidays, wore it weekly to work. It is a slightly different silhouette (at least the bodice is) for me, but one that I definitely enjoy wearing. I think that it would look fabulous made up in a slightly heavier fabric as well for cooler months, with tights, so there might be another version somewhere in my future!
Lizzie is having a giveaway of the pattern so pop over there, not only to see her great version but enter in the giveaway.  Well, just a few more days of holidays for me now and I'll be back in Australia next week, where I hope to start on some new garments for 2015!

FINISHED! A Liberty Atrium Nightdress

I made a few things for our trip overseas, this dress and this hoody which have both been seeing quite a bit of wear, but always after 4 weeks into being away, the clothes I take start to feel pretty tired and you long for something that isn't on high rotation. Not so, my third make which is just a simple nightdress I made using Liberty of London Atrium.  I bought this fabric from Shaukat early last year and not really knowing what the colour-ways would look like in real life I ended up buying two colour-ways (!). The other colour-way, is a real favourite which I made up into a Kanerva , but this one is just too pale for me to make up into day wear, so just days before we left I whipped up this simple nightdress.
The pattern is from a Japanese Pattern book that I've had for a while and I used the 'Lesson 1' pattern. I have made this pattern up before as a top.  It's an interesting design feature because the pintucks just 'flap about'. But I like it.

There really isn't much else to say is there. The pattern is perfect as a nightdress and it goes great with my lounging Liberty Kimono!  The total Liberty lounging (sleeping) ensemble.

FINISHED! Pineapples are so hot right now Culottes

The sewing world has gone culottes crazy and I am no exception. Here is my third pair. My second pair are 90% finished but pattern placement issues have prevented me from finishing them.  I might take some photos of the pattern placement nightmare on them for some end of year bloopers as part of the top 5 series. They are definitely in for winner of worst pattern placement faux pas of the year. Stay tuned.
But back to these ones. Oh I love them so don't even start on pattern placement with these ones! This fabric is from Darn Cheap Fabrics, and I know you will see it pop up all over the blogs over the next few weeks. It's my candidate for fabric of the year! A lot of very cool people have bought it and may also be heading down the pineapple culottes route.  And why not!  This fabric has already been seen on Emma of Ernest Flagg, in a Kelly skirt. The fabric is a heavy linen blend. It has a lovely drape and doesn't crush! And well, pineapples are so hot right now!
I bought the fabric at Darn Cheap Fabrics last week in Melbourne after seeing the Jean Paul Gaultier exhibition and having an all round fantastic day.  Thanks again Nic for convincing me to go down and for organising an awesome day of chatting, laughter, fabric shopping and JPG! And for driving me around!!

Please do yourself a favour and get to the JPG exhibition if you can. It is just so incredibly inspiring!!
For these culottes, I once again used the Liesl and Co Girl Friday pattern.  I really like this pattern and the fact that they are a bit full and skirt like - not just wide leg pants.   And I really like how the zipper is hidden in the pocket. I used the same size as my silk ones, although I worked out the side seams better in this non slippery fabric and gosh it looks nice.  Doing the side seams correctly also reduced the waist a fraction from my other pair.
I ended up taking 8 cms (4 from each side) from the back pleat and as a result the waistband wraps a bit further back, but I like the extra wrap. I should have taken some from the front because there is significant ease but it's not enough of a problem to bother me.  Of course I could probably go down a size, but now I know what to do with this pattern, I think I'll just stick with these changes.
And a final photo bombed shot to see how long I made them. They are long! I'm not sure proportionally for my height they are right, but do you know, they feel the perfect length when I'm wearing them... and sometimes that's all that matters.  Is this the end of the culotte making for me? Oh I don't think so!  Are you on the culotte trend?  If not, why not!!!

I'll be back very soon with a couple of very cool Japanese books and some giveaways. It's Christmas after all!!

FINISHED! Undercover Marthe

I have been working on some more culottes but I needed a break from them so decided to sew up the other piece of Liberty of London Linford Fleece I had in my stash.  It takes up quite a bit of room and I thought I might be able to make up another garment to take overseas.  I'm also off to Melbourne on Wednesday for the day and I have every intention of adding to my stash there!  This Rachel de Thame fleece came from Tessuti. I bought it off an instagram photo and was so over joyed when it arrived because, to be honest I wasn't exactly sure what fabric I was buying at the time and I have been really wanting this one.
Fabric story: Liberty of London's AW13 Five Senses collection contains a capsule pertaining to Taste. Rachel de Thame was designed by Central Saint Martins’ student Morgan Levy. The leaves are taken from blackberries, which can be used to create natural dyes. Rachel de Thame, a judge of the 2011 Central St. Martin collaboration, selected this design. 
When I made up the Republic du Chiffon Marthe blouse recently I always had in mind that I might use this pattern to sew up the fleece.  This year I have been obsessed with this silhouette and while I like the Marthe as you know I was a bit disappointed with the size of the neck. That, I should say hasn't stopped me wearing it constantly on the weekends. It really is a great weekend blouse. Anyway, I also had in mind that I wanted to add a hood to the pattern to make it a really snuggly make. 

Well, snuggly it is. Instead of the Marthe pattern, I returned to the Papercut Patterns undercover hood pattern, which I've made up here and here.  I raised the neck ever so slightly on the pattern and used the hood piece. The hood piece is heavy as it is two pieces of fleece, but I really like it.  I cut a piece the width of the fabric for the peplum and gathered to fit.   The Marthe curves this seam a bit but I cut just it straight, similar to my wildflowers make. 
Where I could, I top stitched the seams, including at the raglan sleeves, the neck and the gathered 'skirt'. I had a bit of a brain lapse and didn't overlock the sleeves, but hopefully they won't fray.  The wrists and hem are turned under then stitched with a twin needle. I keep reaching for a kangaroo pocket in this top, but I think that might have been just a bit too much.  

 
While it is probably a predictable make for me, I love it and can't wait for the temperature to drop!

FINISHED! Snuggly Saxby Dress

I bought 1.5 m of Saxby (colourway B) Liberty Linford Fleece from the Workroom back in the middle of winter here and because it took a little while to come all the way from Canada, once it arrived, I had moved onto Spring sewing.  Funnily enough with temperatures in the mid to late 30's on Friday, I became 'winter inspired' again and decided my next project was going to be to cut into my precious fleece.  It's not all madness as we are off to France for 6 weeks in December, so my mind has turned momentarily to what I should make/pack for the trip and today the temperature plummeted so it was perfect weather to sew up a cosy outfit. 

This is my first ever piece of Liberty Linford Fleece and it feels so snuggly. Oh so cosy! The print is Saxby and is from the Liberty Art Fabrics Collection AW 14.  The design was inspired by the decorative bird life at Mount Stuart in Scotland, in particular the parrots in the drawing room. To design the print, the birds were painted onto canvas in a loose, free style, and then merged to create a rich feather texture.
When I bought this piece I really didn't know what I was going to do with it. I don't really sew that much in fleece (although I also have another piece of Liberty Linford Fleece so watch this space!), but inspiration struck and I've sewn up a dress. I probably could have just sewn it up as a Coco, but instead I pulled out my hacked Kanerva I used to make my frocktails dress and used that as the base.  It is a medium/heavyweight with no significant stretch so I sewed it up with the darts and everything. 
I added navy ribbing to the neck and wrists, to make it even more snuggly. I worried that maybe it made it too sporty? but I kind of like it. There isn't really anything else to say about the construction, other than I added vilene bias tape to the hem for stability which worked a treat and then I double stitched it. I haven't top stitched the neck down but I'll see if it needs it.
Will it get packed in my suitcase for France? It might. It's snuggly, warm and comfortable and goes with my boots!

FINISHED! Ciara Marthe Blouse

The new Republique du Chiffon pattern, the Marthe Blouse was released last week and it quickly sky rocketed to the top of my sewing list. I adore the lose peplum style and while it is not dissimilar to the top I made from Liberty Wildflowers a few months ago, which had turned into one of my most worn tops, I thought the raglan sleeves might add interest and I was interested in making a top that had a higher neck. I was taken in with the line drawing and the fabulous photos.
 
I chose a Liberty that I had in the stash, which I bought on a bit of a whim when the latest collection was released called Ciara C.  The Ciara design was originally for a scarf in 1969 and has been recently redesigned for the Classic collection.   
The pattern only comes in pdf, which is fine by me and the pattern is in French, but don't let that stop you as there are plenty of pictures and this is a very simple pattern, so I didn't always use the instructions.  Like all the RdC patterns, it is necessary to add seam allowance. 
The pattern back is cut in two pieces and the pattern calls for either an invisible zip or a button at the neck. Given the closure requirement (and the line drawing), I was expecting that the neckline would be much higher, thus requiring a button, but on trying it on I realised that the neck was wide and definitely did not require any fussing around with closures. I simply sewed up the back seam. Unfortunately while I didn't need the closure this meant that the neck was not at all what I was hoping for.  I really wanted it to be a smaller round neck which would act as a contrast to the volume. Oh well, it's not bad how it is, just not what I had wanted.   
I sewed the arm seams up a little smaller to try and take some width out of neckline. I also took an inch and a half out of the length of the bodice, bringing the skirt seam up. I really like where that sits. I took about 2 inches off the length of the sleeves but I find myself wanting to push my sleeves up even more so perhaps I should have made them just a tad shorter.  
Rather than gather the 'skirt' traditionally using 2 or threads, I used my overlocker. This worked ok, but I think I'll be going back to the gathering method next time.While I hate pulling those threads I feel as if the gathers look a bit pleated on this make. 
Have you been participating in Amanda's #bpSewvember on instagram? It has been so much fun and there is still more than half of November to go! I  The other day we had to do our #favouritefinish and Jillian said her favourite finish is a Woo Hoo finish. What a great interpretation. Sadly, while this is a fun make, the fabric is fab and  I'll wear this during summer with my Iris shorts, it isn't exactly the woo hoo finish I was hoping for. C'est la vie! 

FINISHED! A dress for race day

This was supposed to be a fun post about the dress I made and wore for Melbourne Cup day. Australians all know the Cup, but for those of you not in Australia, this horse race really does 'stop the nation'! Almost everyone watches the race.  Workplaces (that still work on this day -Victorians get the day off) usually have some form of lunch and then all crowd around a tv (or mobile phone!) to watch the race at 3pm.  I love the day. I always make a special effort for work, wear something fun, don a fascinator, have a glass of champagne and always buy too many entries in a sweep thinking that I'm going to win and never do. Unfortunately yesterday was marred after two of the horses died after this years race, so I have been torn as to whether or not to share this dress, but I have decided to share it. I'm sorry if it offends anyone.
I found this fabric for $5/m, clearly polyester, at Spotlight and immediately had in mind a Melbourne Cup dress. Seriously, it has every type of horse event on it so it was an obvious decision. I have had a bit of 'post make' regret that I didn't just make a skirt that I would be able to then don a stripey top with (my usual neutral), but that wouldn't be 'Melbourne Cup'. A dress it had to be and a pussy bow seemed appropriately costumey for the Cup.
I have been extremely busy lately and I knew the time leading up to Cup Day would be limited so I decided to go with a tried and true pattern: W from 'Les Coleurs Francaise' by Tsukiori Yoshiko.
I have used this pattern many times, hereherehere, here and here, Phew That's a lot of times! It is originally a top pattern, but this is the second time that I have lengthened it into a short dress.
I didn't quite have enough fabric to match the rows of horses up exactly so I matched up the stripes but just not the exact horse pattern. I don't mind it in fact - it provides a little bit of interest on the sides. And I love the orange collar!
The colour probably doesn't do my hair and complexion any favours but a dress for the races, should be a bit over the top and the colours I think are perfectly flashy for the races. I did wear a fascinator but it was a bit boring and rushed so I don't have any photos of me wearing it.  Next year I'll start earlier and raise the standard of my fascinator. On the day, this was a very fun dress to wear and I got a lot of comments about it .. and my orange shoes!

FINISHED! Splattered Turia Dungafores

A few weeks ago the very lovely Mel was visiting Canberra and a few of us were lucky enough to catch up with her for a little bit of local shopping at Addicted to Fabric. It had been a while (days? weeks?) since I'd been to Addicted to Fabric and so there was quite a few new pieces of fabric to peruse. The one that caught my eye was this one called Ricochet. (97% cotton, 3% spandex). At first I thought I'd make a dress out of it, but it is quite thick and very quickly my mind turned to the pinafore dungaree, which Pauline had just done a tutorial out of the Turia pattern. Egged on by Amanda's new coined phrase, the dungafore, I was on my way, crossing off the current trends of painted fabric and overalls all in one hit.
This week I finally got around to making them.  Well, correction, this week I became obsessed with making them. Every night I sewed for hours, quietly chipping away at them, fluctuating from love to fear back to love. Would they be too 'out there', 'not age appropriate', blah blah blah. Now they are finished I love them. (Although after looking at a lot of photos taken of me wearing them I wish I'd got that print placement a bit better in the front !!! Damn!)
I made this pattern, the Turia up in the long version previously as a tester.  I love those and wear them on the weekend heaps, but it's not my best sewing so on these I made sure that the stitching on these is much sturdier. I ensured that I overlocked every edge, rather than just folding and stitching.
I also cheated a little bit and I only did fake flat felled seams: stitching the seams together, overlocking then double stitching in place. This is easier but the main reason was that I can get a much neater finish on the outside with my twin needle.
I like my dungarees a bit loose so after reading that Sasha (via Ninie (who also made the cutest pair of short dungarees)) didn't need a zipper in hers I decided that I didn't either. They pull on easily because of the stretch in the fabric.
Pauline in her tutorial reminds you to add extra length onto the pattern if you are making a pinafore, but clearly I didn't add enough on.  Ben liked it the length it was, but it just seemed way too short, even for me who doesn't mind showing the old pins.  I rectified this afterwards, with a design feature additional panel to make them more a decent length!
I am super happy with my dungafores (print placement aside) and cannot wait for the weekend to come around so that I can wear them, with any number of striped tops in my wardrobe(!), my favourite neutral, before this fad disappears.