Showing posts with label Tessuti. Show all posts

FINISHED! More Esthers

I had the last week of January off, coinciding with the last week of school holidays and managed to whip up two more pairs Esther shorts from small scraps in the stash during the little staycation. I now find myself in Week 4 of school and can't exactly account for the time. So here, better late than never a couple more pairs of Tessuti Esther shorts. That makes 4 pairs, with no end in sight. The first two are here.  
The first pair I made up using left over fabric from my Xerea dress.  These, despite the dodgey photo are my best fitting pair. I went down another half size with these and the fit is spot on with the slight stretch in the denim. The colour is excellent and it was great to rediscover tops in my wardrobe that I hadn't worn in ages which are perfect with these shorts, such as this Grainline Archer which normally languishes in my wardrobe.
 The second of the January Esthers, are this pair made with the remains of my CBR frocktails dress, which appropriately is from fabric from Tessuti purchased back in December 2014.  It is heavy weight and textured and quite sratchy so these are lined.
The fit of these are a bit snug in the waist because of the fabric but that doesn't stop me wearing them. I love these and of course paired with the ubiquitous stripe top feels pretty darn perfect. I originally bought this fabric to make a pair of culottes and while now I think that might have been an outrageous idea, these shorts are a good second best.
 
This isn't the end of my Esther making, but for now have taken a rest from shorts. I had been attempting swimwear thanks to the sewalong hosted by Susan, but now the siren song of ruffles and Liberty is too strong and have been lured into sewing up the new Aime Comme Marie pattern.  What are you sewing?

FINISHED! A seersucker two piece setacular

For Christmas I received 2 metres of Japanese blue checked seersucker from Tessuti from my sister! Such a great present! I debated about what to make, I had seen so many gorgeous Annie dresses and other maxi dresses using this fabric on Instagram, but decided on the Esther shorts and then quickly after, a matching top to wear for NYE.  

Honourable mention firstly, to my first pair of Esther shorts made out of rayon (viscose) ottomon suiting from Spotlight. I initially saw the fabric as some amazing pants on Kat and then the fabric was kindly enabled by an instagram moment by Lizzy, who picked up some for Amanda and myself.
So these shorts are ok but they are too big. Easily at least a size too big in the waist and bagging in the butt. I still wear them because they are comfy and because the flowers are super - but they aren't the magic shorts that I had envisioned. A wearable muslin if you will. 
So newly armed with a better sense of sizing I cut into the seeksucker. This time I went down a half size in the waist and used the darts for a 6 in the butt.  I think I need to go down a tad more in the waist.

I added an inch to the original length of the shorts, but looking at these photos the shorts could probably be shorter. I have higher shoes which I had planned to wear with this outfit but I left them at work over the holidays (my drawer has a few pairs of shoes in it as I tend to race into work in sneakers some days!).
After finishing the shorts I realised I had just enough fabric left over to make a matching top. Thank goodness!  I turned to my trusty Kanerva which has served me well over and over. It wasn't the plainest sailing - those sleeves for some reason were a nightmare to get in and I wasted time putting the back and front darts in only to pull them out as the top didn't sit as well as I wanted it to with them in.. but I just adore the top and especially with the shorts.  I love the curved hem. 
I've left some blooper shots in as my oldest boy was sitting in the loungeroom pulling some blue steel faces as me as I took theses photos. 

So while technically this is a 2015 make, I'm calling it the first #woohoomake of 2016. I wore it NYE, then washed it and wore it yesterday. I'm years late to the setacular party but I'm here. May there be many more #woohoomakes this year.
 

FINISHED! CBR Frocktails Flutter Dress

Photo taken by Michelle, CBR Frocktails at Hotel Hotel
Last night we celebrated at Canberra Frocktails, an event that saw some glamorous sewers from Sydney, Brisbane and Melbourne join the CBR sewing crew for a night of fabric stroking, chatting and never ending (dangerously never ending) glasses of champagne.  Was lovely to get together with friends, meet some new sewists and finally meet in person those who feel like old friends.  For my frock I chose the relatively new dress from Papercut Patterns the Flutter Tunic.  
The fabric suggestion is light to medium weight but I chose a textured heavy weight fabric that was labelled silk (but silly didn't write the name down), bought at Tessuti in Melbourne last year with Nici when I was down for the Jean Paul Gaultier exhibition. The underside is just a teensy bit scratchy so I underlined the bodice with a voile, which also meant that I didn't need to bind the neckline.
The fabric presses reasonably well, but I handstitched all the seams down to ensure there was no flapping about. I wish that I was the kind of person who does hong kong finishes because that would have looked lovely, but I'm not so the seams are all overlocked.  The sleeves and hem are simply turned over and hand stitched.
I made up the smallest size with no alterations.  I sort of wish that I had made mine a little shorter ...Lizzy also made a fabulous Flutter tunic - she is two inches taller than me so hers is a perfect length.
I really like this dress in the thicker fabric and how it makes it a bit more structured. I think it would look amazing in denim! I loved wearing it last night for such a fun fun night. Look out for others posting their amazing makes. Jillian has already posted her fabulous CBR Frocktails dress.

FINISHED! Caramel Sydney

I have become quite fixated with vest jackets and short sleeve jackets of late, so when the Sydney Jacket was released by Tessuti, I immediately snapped it up. I dreamed of making it up in leather, a deep blue leather, but when I rang the Fabric Store, it was suggested that I might need 4 hides, so in the interest of money and perhaps checking out the pattern first, I asked instead for a range of wool swatches to choose from. 
The caramel won out over a camel as I have always loved this colour and lately Chloe have been tempting me on instagram with clothes in rich colours from this palette which I find hard to resist. This wool is a really lovely soft wool with great drape and warmth that I ordered from the Fabric Store in Melbourne when they were having a 30% sale day.
I received the wool on Monday, cut it out on Tuesday, and sewed Wednesday and Thursday night for a short time each night. The pattern is not hemmed, so cutting, which has never been my strong suit is important. I recommend, and this is probably obvious, cutting a single layer at a time. I also neatened up some seams with my ruler and rotary cutter.
The pattern was fun to put together and I surprised myself by enjoying the method of construction which is to layer the fabric over each other to create the seams. It was in some ways like putting a jigsaw puzzle together. There were only a couple of spots in the instructions where I had to really think about how to attach pieces. I found marking the 3/8 seam and then laying the fabric on the marked line absolutely essential.
The instructions call for sewing in the middle of the 3/8 inch seam, but instead I sewed closer to 1/8 inch which leaves a slightly bigger seam of fabric on the inside, but the 1/8 suits my preference on the outside of the coat.  The smaller seam makes it less obvious that the fabric is overlapped, which some people might like as a feature.  I made up a petite, the smallest size with no alterations. 
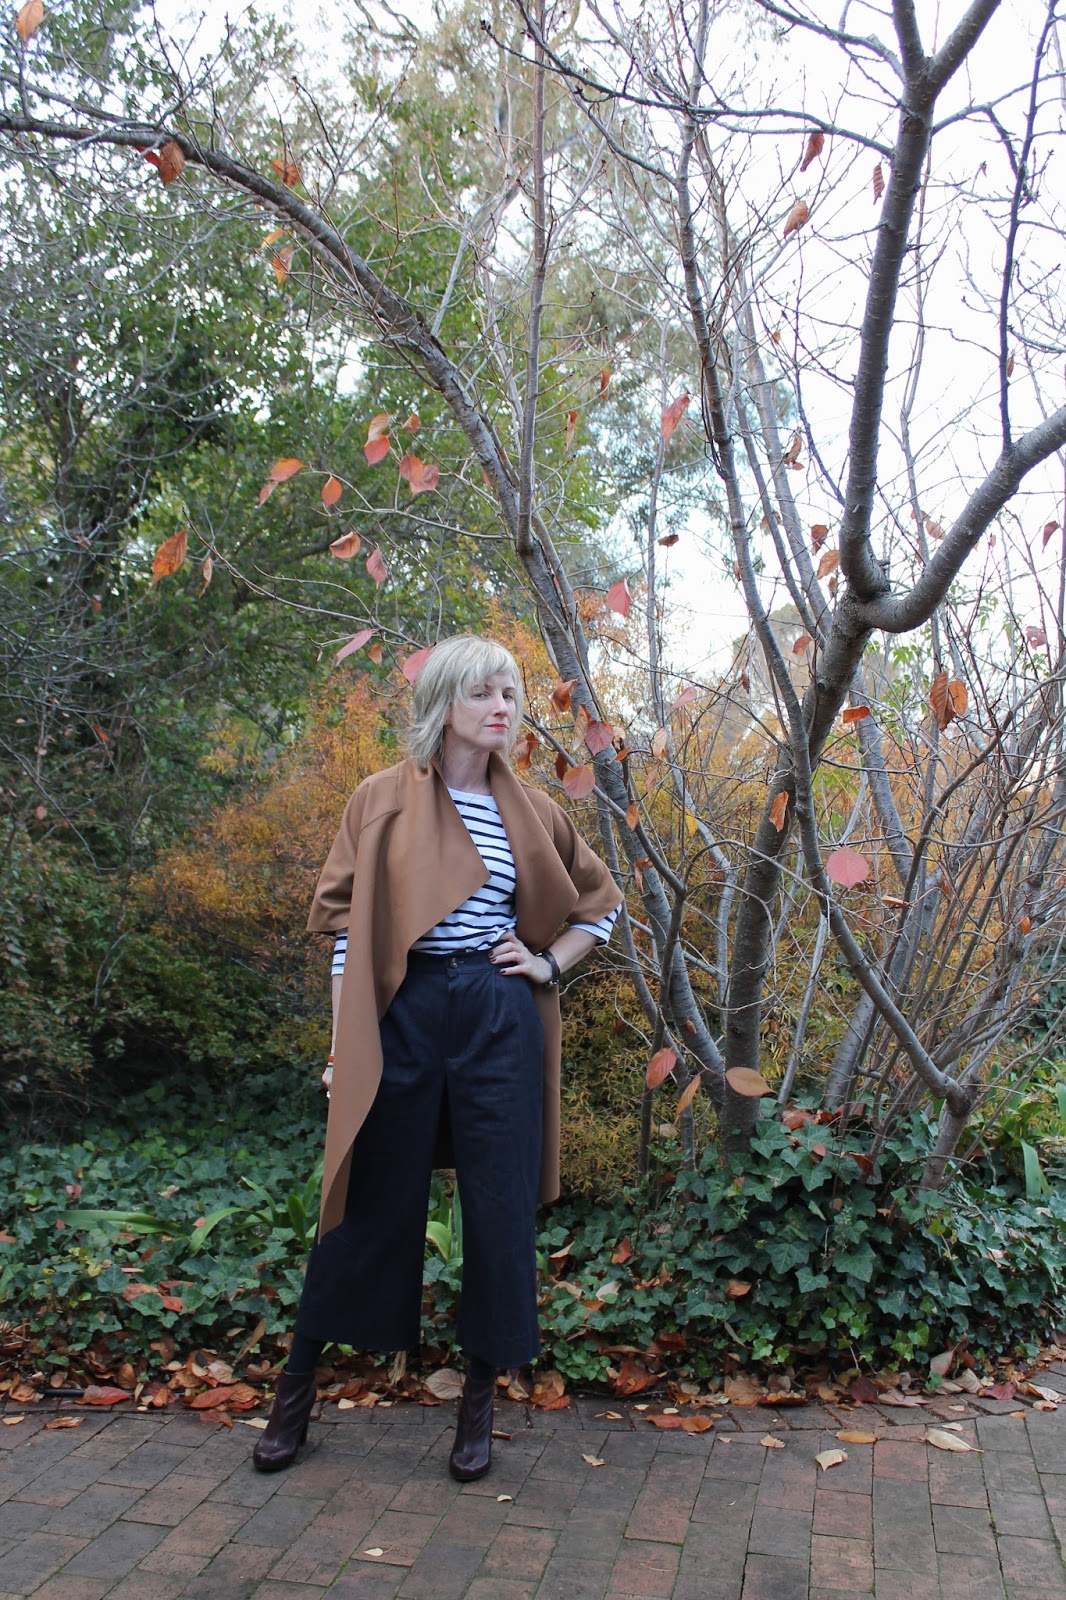
I am so happy with this coat. I thought that at first that it might not look modern and smart, but I think it looks really great with both these outfits photographed and I wore it on Friday night with my jumpsuit and felt truly a million dollars.

This is already a very popular pattern popping up regularly on instagram. Every version seems to be great. Great work Tessuti and yes, I'm still keen on that leather version!

FINISHED! Teal Butterflies

There seems to be a few pieces of fabric that take the sewing web by storm and we all snaffle it up, especially since the rise of instragram!  In 2013, it was this fabric, late last year it was pineapples and this year this amazing piece of ponti from Tessuti seems to have found its way into many many a shopping cart.  Clearly I'm a bandwagon jumper and I bought 1.75m of the fabric in late February.

I don't think the fabric is available anymore but it was Stretch butterfly teal (Italian 65% Viscose 30% Polyamide 5% Elastane digital printed ponti knit. Width:145cm).  I bought it because I was immediately reminded of Valentino and the vast array of beautiful butterfly dresses like this one below.
VALENTINO Butterfly Print Babydoll Dress

I love the work of Maria Grazia Chiuri and Pierpaolo Piccioli for this house. If I were ever to buy a couture dress I would be hard pressed to go past Valentino. Like fashion, I can be fickle but I only loved them more with the recent surprise appearance of Ben Stiller and the Owen Wilson at their latest runway show in Paris. Anyway, I digress.
With my eyes on the Valentino dress as inspiration I revisited my Frocktails 2014. I thought this was a good shell but thought I might gather the skirt.  I used the skirt from the Moneta which I bought especially so that I could use the skirt pattern.  Honestly, I've never done so much unpicking as I did on this dress. It is ridiculous given how simple the dress is.
I retraced the original bodice pieces and removed all the seam allowance to get a tighter fit.  After attaching the skirt to the bodice I felt that it still needed slimming so I took a wedge of 1 inch off the sides. I think it could still be a better fit but it's good enough. I have minor regret on the gathered skirt as I didn't really have enough fabric to do it justice and the front is more gathered than the back. Let's call it a design feature. I also feel that sometimes it falls a bit heavy. I like my waists to sit high.  I'm not sure how to fix that. I tried a bit of elastic in the waist seam but it does feel like a waste of sewing (and unpicking!).
The neck, wrist and hem are all turned over once and finished with a twin needle.  The back is closed with an invisible zip.  Sorry, I didn't bother to pattern match at the back. I kept the hem longer than I had originally envisaged.  I'm still thinking about it, but it does provide a bit more flexibility at this length, though I do like to get the pins out.
Despite all the mumbling during this post I am happy with how it turned out. But I'm mighty glad that it's done! I've got a wedding to go to next weekend, so this will be getting a run in the wild!

Oh and while we are on the topic of fancy dresses, CBR sewing crew are hosting a wonderful Frocktails event on the 27 June. All the details can be found here.  I won't be wearing this dress but I will be making up something fab to wear. Hope to see a lot of you there!  The venue is truly stunning and shows just how much Canberra has to offer.

FINISHED! Ocean spray scuba saunio

I made this quick and easy jacket up on the weekend and wore it to work on Monday.  It's another of those makes that makes me laugh a little when I wear it. But first, let's talk about the fabric.  It's Ocean Spray Scuba from Tessuti. I have never sewn with neoprene before and frankly I didn't think I ever would until I became just a little bit fixated on it through makes by Oona, Julie and Debbie. I then saw this fabric pop up on the Tessuti website which I stalk almost daily and it was in my cart with my eye on a jacket before I knew what I was doing. It's Tribute August over at the Sewcialists so this is my tribute to the neoprene lovers, Oona, Debbie and Julie!
I took this photo with the fabric on the line. You can see much better here the actual repeat pattern of the fabric which was difficult to see online. The colours were also more vivid than my computer displayed. 
I'm sure there are a lot of people who will be making a gorgeous shift dress or the like with this fabric. It certainly deserves to be showcased. Both my mum and Ben thought I should make a dress, but I was a bit frightened off by the boldness of the pattern.  I couldn't work out where to place it and found it a bit bright for my usual style. I was already out of my comfort zone with this print and with the neoprene, so perhaps I should have just kept going, but I had bought it to make a jacket so after quite a bit of too-ing and fro-ing decided to stick with my original idea of the jacket. 
I used the Saunio cardigan from Named Clothing pattern. It was my first time making up this pattern, but I have enjoyed my experiences with Named patterns and this one sewed up nicely. The only change I'd make next time would be to neaten where the facing meets the bottom edge as the facing is shorter than the front and so you are supposed to turn it up where it might be nicer to turn it under somehow.  Looking at the pictures it could perhaps be a bit shorter, but that is deceiving as the front hangs down because of the way the front crosses over.
I'm not sure I'm a neoprene sewing convert.  It doesn't iron well so I had to do a bit of top stitching with my walking foot where I wouldn't normally: firstly around the sleeve seam and then all the way along the front and the collar. Normally I would have just understitched here but there was no way the facings were going to stay under without it.  The style of cardi/jacket means that quite often it flips out so it's good to have the facings there.  I had studied a RTW neoprene dress at the shops over the weekend and noticed that they simply cut the armhole and the bottom without hemming it. I contemplated this, but in reality this neoprene is just bit thicker than ponte so it felt a bit slack not to hem. I used a twin needle with the hem turned up once and it worked perfectly.  I didn't bother overlocking the seams.  It does have good body to it which suits this jacket well.
All in all I like how this turned out. It's not exactly me, but I am so glad I made it into a jacket as I prefer the bits of pattern that I used, especially on the sleeve seam where there is light and dark. I wore it to work on Monday and I admit to feeling just a little bit over the top in it, but I enjoyed wearing it. I like the Named Saunio pattern: the dropped shoulders and 3/4 tapered sleeves. It won't be the last time I make this pattern up.
As for neoprene, I've probably done my neoprene now. But never say never. What about you? Are you dipping into the neoprene craze? Are you participating in Tribute August?

FINISHED! On the Line Veste Michelle

This project has been hanging around so long I wasn't sure I would ever do it. But I finally just knuckled down and did it. It is of course the Veste Michelle by Republique du Chiffon.  It is made using some denim stripe that I bought at Tessuti in January called 'It's on the Line'.  It's lined with some cheap yellow lining (the same as my Bomber). On the advice from my friend Jen (who has a great new blog btw!!), I turned the fabric around so that the stripes run sideways. I was worried that because there is a bit of stretch in the fabric that it might distort but so far so good. 
There are heaps of great versions out there of the Veste Michelle and if you ever decide to make a Republique du Chiffon pattern a great place to stop by is the RdC Made by You blog. It goes without saying that Julie has made one, well 4!! lovely versions in fact and Ginger Makes also made one.  
So, straight up, I'm not sure if I'm wearing the jacket or it's wearing me. It's a straight size 36 with no adjustments. It's supposed to be oversized and it is definitely that helped along by my height.  I debated making it smaller but on all the versions I saw they were reasonably oversized, just not as long perhaps as mine. I feel that it's ok when I'm accessorised up with my every day winter additions of beret and scarf, but without them, I'm not sure that it's balanced. I need to play around with some Spring styling. It's a bit of a different style for me, although despite that reservation I like it. I wore it as photographed this morning to a 6 yr old birthday party and I have to say those oversized pockets were fantastic for popping lolly pops and things in. 

I cheated a bit on the patch pockets.  The pattern calls for you to line them but I didn't.  I feel patch pockets are very 'home made' looking but I hope these look ok. I double stitched around them. There is no pocket placement on the pattern piece (that I could find) so I just winged their placement. I've noticed on other makes that their pockets are about the same place as mine. Phew. I omitted the tiny pocket on the top because I felt it didn't look right. 
The printed pattern is in French but there are detailed (French) instructions including photos on the RdC blog  These were both a hindrance and a help and some bits (like the collar) I should have worked through myself rather than trying to decipher the at times odd google translate description. Despite that it is a straightforward make and the lining comes together nicely.  The best I've ever done!
The only real problem I had was 'drooping' of the back facing once the lining was in.  There were some photos of this on the RdC blog but I couldn't understand what I was supposed to do to fix it. I ended up hand stitching the bottom facing to the back under the lining in places.  It solved the problem but I'd love to know what the real solution is! What do you do for the back of jackets to stop the bottom facing 'drooping' down?
So, it's good to have this one finished and wearable! It might even get quite a bit of wear as the weather moves from mid winter to very early spring.  I'm still fixated with Winter sewing at the moment, it might have something to do with the weather, but it's also because we'll be spending 6 weeks in France over Christmas - so double Winter for us this year!  

FINISHED! Wildflowers Peplum

Last weekend I spent some time working on a pair of Anima pants in a very cute houndstooth knit. The story of that make, which was unnecessarily tortured, is for another time (or not at all) but I'm sad to say, they look horrible on. So after such an unsatisfactory dalliance I felt like I needed to come home to some Liberty.
Liberty Art Fabrics Wild Flowers D Tana Lawn Cotton
The fabric I came home to is Wildflowers D from the 2014 Autumn Winter collection of the same name 'Wild flowers'.

Here is the fabric story:

Wild Flowers by Su Blackwell is a recollection of early childhood journeys across the British landscape in discovery of native flora. This joyous Liberty fabric was initially inspired by illustrations from an early 19th Century book, 'Field Guide to Wild Flowers in Britain'.

I'd also recommend going to Su's site for more in depth information on the print and the original inspiration.

All the designs are stunning and beautiful, of course, but I think there is only so much flowery Liberty I need and there seems to be other Liberty fabrics being released that are more interesting to me at the moment (that are part of other stories for the Autumn Winter 2014 collection, like Laurens Leaf).  I did buy this one though from Tessuti with the original intention of making a Veste Bernadette, but when the fabric arrived, while I liked it, I just didn't feel it was right for that jacket. Too much somehow. So it sat in the stash for a little while I contemplated what to do with it.
 
I became inspired by a very loose peplum style top. My journey started with the Chemise Maeva and while I'm not 100% sold on the button down for me, I love how floaty it looks. In more Republique du Chiffon love, I have also been covetting the Robe Lucie, especially Joe's which looks gorgeous.  We are in the middle of winter here so the Lucie will need to wait for now. Finally I'm sure you are all familiar with Debbie from Lily Sage and Co.  Not only do we share a love of the drop waist, but that lady knows how to do a structured peplum, but this fabric needed a gathered one.
So it was set: a loose peplum top with 3/4 sleeves.  I used the pattern from the Burda Wrap top as the basis as I like the 'kick' that this top has and just cut the front on the fold. I then roughly worked out where the gathered piece was going to sit and sewed it on. Nothing complicated.
I have a bit of excess fabric under the arm at the back, but I don't mind as it is a loose top. The result absolutely matches my vision. It's got the right shape, which is unbelievable. I've already worn it heaps and I love it with my pants and work shoes as much as I love it with my jeans.
I struggled with photos of this top.This is one of those makes that looks better in real life (I think - I hope!). Also because of the colours, when I stood in my usual spot in the front garden I was camouflaged. So for once I used our 'handball' wall - hence the chalk lines! Sorry.

Next up - I'm going to work on my Veste Michelle, it's been half traced for weeks now so it's time I got on with it.

FINISHED! Ocean scallop lace Coco

Completely unexpectedly, here is my second finished Coco. This time the dress.
Last week I started a muslin of a pair of Colette Clovers, but after sewing the muslin went a bit blah about the project and put them aside.  I then cut out another Kanerva, but didn't have the right thread to start sewing up so on Friday,  so thought I'd cut out the fabric for another Coco.
I bought 1.2m of this slightly stretchy knit from Tessuti when I was there in January (It's called Ocean scallop lace and is 4% elast & 96% polyamide). When I bought it I thought it might make fun leggings and even bought the Megan Nielson leggings pattern to make them up.. but then got cold feet (or legs) and never went through with it.
On Friday it seemed right to cut this fabric as a Coco. My first Coco is quite fitted so this time for a dress version I cut straight down the side, omitting the slight tapering that happens as I was looking for a slightly more 'swinging' version. I didn't quite have enough fabric so cut the sleeves cross grain (?) which turned out perfectly as I used the selvedge omitting the need for a hem.
Before I knew it, the dress was cut and I was overlocking the seams.  With my first Coco, I sewed then overlocked for neatening, but with this one I went straight to overlocking.  This always causes me a bit of a problem with the sizing as I always find it hard to overlock at big seam widths.  I need to get out the manual and read this bit again. I admit to running down the sides quite a few times until I was happy with the fit across the shoulders.  My first one fit so perfectly that it was weird to try this one and find it so big across the shoulders. It is still not perfect with a bit of excess but not a huge deal.  A product of a different fabric weight as well as no funnel neck perhaps.
By the time the sides were sewn up I knew I wanted to wear this dress to a party we were going to on Saturday afternoon.  After all I only had the neckline and hem to do.  Now Saturday mornings are extremely busy so this probably wasn't the best idea but my mind was made up.  The clock was ticking. I put out a call on instagram to Kelly and others as to how to hem as I don't love knits. Lots of suggestions were to just cut the scalloped edge, but given the weight and content of this fabric, I was worried about it rolling or fraying and Kelly suggested heming with bias tape.
I popped down to Addicted to Fabric during Oliver's piano lesson and they convinced me to use elastic in the neck and as a hemming tape. It was genius. I probably could have stretched it a bit more at the neck for an even flatter result, but I like how it makes the neck sit really flat and I like the weight it gives to the hem.
The only thing I regret was that I originally sewed the neckline and hem using a zigzag stitch. I hate this stitch. I tried to convince myself that no one would notice it but couldn't. So after finishing it and dropping Oliver to a birthday party, drove with purpose home to unpick it and use my twin needle.  Do you know how hard it was to unpick this!? Mmm, so unpicking finally finished I loaded up the twin needle but didn't change the stitch (because let's face it, now it was almost time to be leaving for the party and I was a bit panicky) and immediately broke the needle as the machine tried to do a zigzag.  #$%!  No spares.  Urgh. So single stitch it was around the neck as I faced the reality that going out to get another needle would be unsafe!
The hem remains zigzagged and will forever because let's face it, no one is going to notice that part of the dress. I took these photos Sunday morning, recreating my look from Saturday afternoon. I really love the long socks with ankle boots look.. could be my Autumn style.  I really like this look on me and think with the right fabric there might be another Coco in my life.