Showing posts with label Liberty. Show all posts

Two piece Liberty silk twill setacular

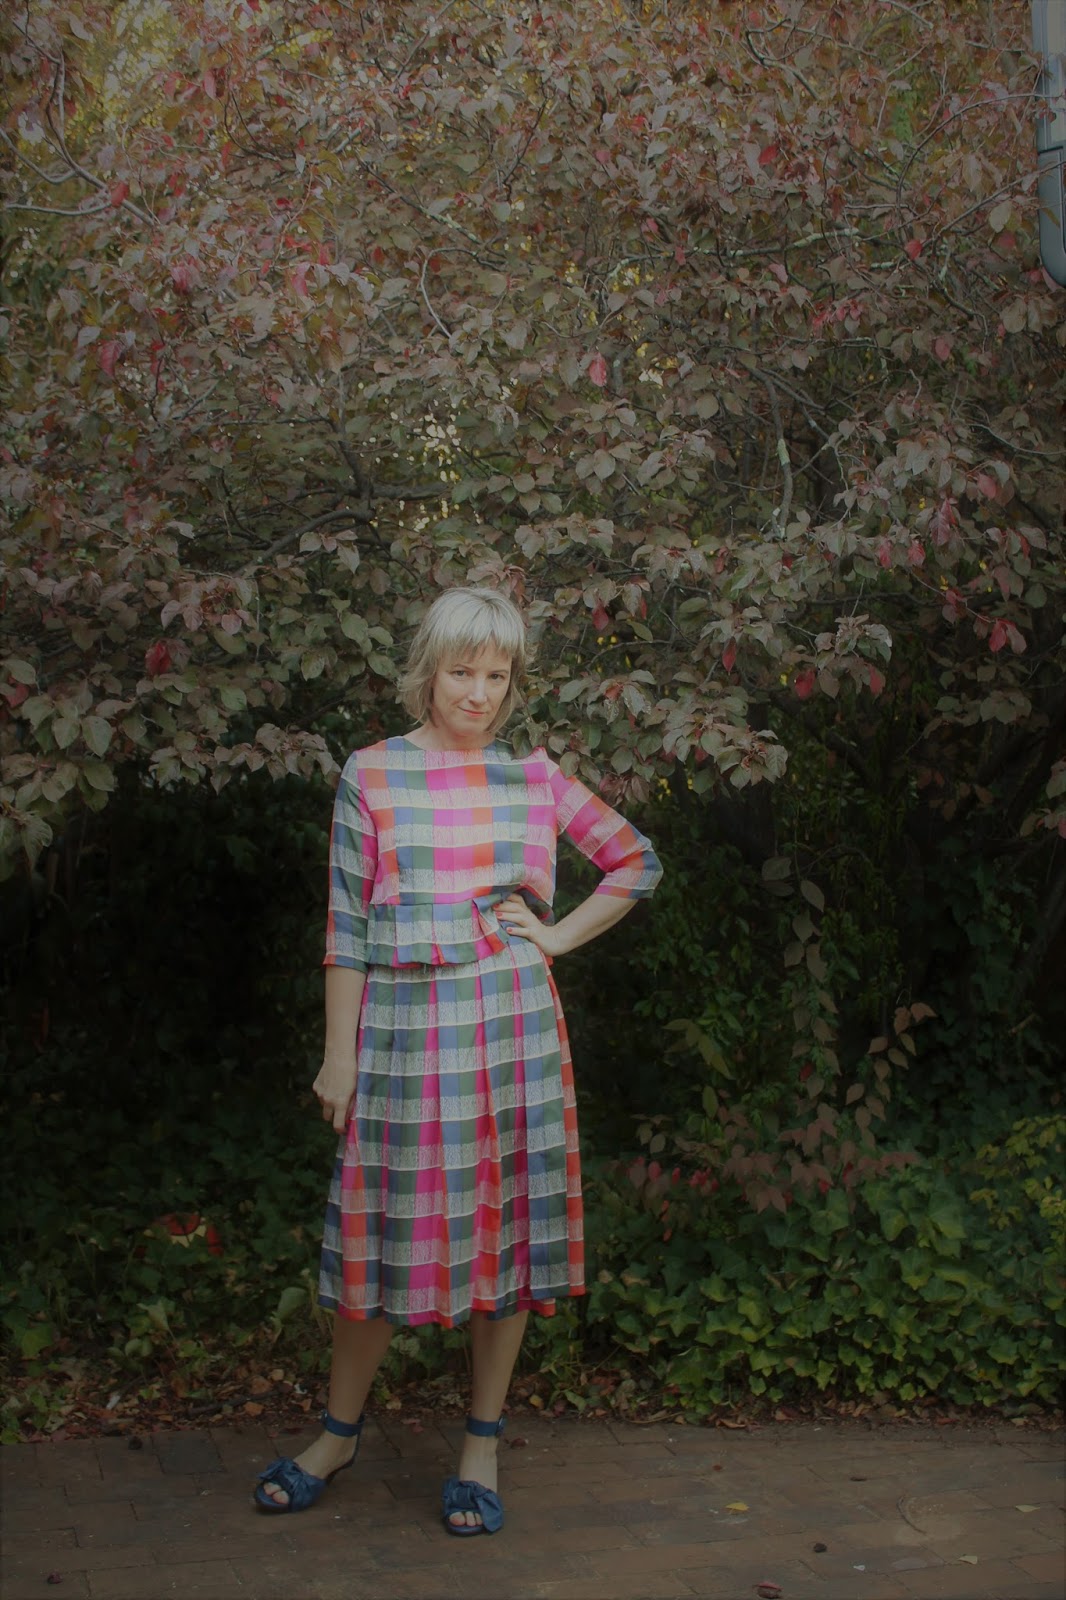
Last weekend I attended the superfun Sydney Frocktails hosted by the wonderful Caz (Useful Box).  It was a great night and I met loads of lovely ladies and saw again many sewing friends. Honestly though weeks out from the event I was really struggling for an outfit and was close to not going. I didn't want to wear anything I already owned and I didn't have any fabric in the stash to sew up.  In almost desperation I decided to bring out a skirt I'd made back in August but had never worn as I didn't have the right top to go with it (well of course it goes with stripes but not perfectly with any stripes I already own - as hard as that is to believe) so I, at the last minute, bought some extra fabric over the phone from the Fabric Store to make a two piece setacular.

Warning - these photos were taken the day after the event, I am tired and my outfit had become quite crinkled and I didn't put nearly enough effort into ironing it..but it's been so long since I posted I thought I'd better get something on the blog!
The fabric is a Liberty of London silk twill which is a bit tricky to sew but the twill gives it some stability, only of course to be offset by the stripe matching required.
The skirt is a simple pleated wrap skirt which I made up as I went.  I had no interest in putting in a zipper to this fabric so the waistband is just a long piece that wraps around and through a button hole. I haven't quite worked out where the wrap should sit but the tie is long enough to wrap around either to the front or to the back.  
The top is from 'We love Tops' a Japanese book. I've made this top up a few times but it has never really worked for me with pleats, but this fabric just calls out to be pleated and I needed it to be cropped to work with the skirt.  I really love the top and  will wear it seperately with my navy culottes. 
 Do I love it?  Mmm..  I think I did a great job at matching the fabric with a pattern. It's super fun to wear and I did enjoy the feeling of silk.  But I also felt a bit dowdy in it which might have somthing to do with the skirt length and the shoes I chose to wear with it (despite the fact that I do love these shoes) I think they needed to be higher.   Sewing can be a bit like that can't it?

A bit of a roller coaster of liking it, loving it, hating it.... loving it again.
I managed to pick up a bit of fabric last weekend, so excited to get sewing again following the Christmas present rush and the sewing laziness that followed!

I love (peplum) tops

Hi! It's been a while!  I've been a bit sporadic with my making over the last few months.  I have two pairs of corduroy culottes and another blouse to post.. sometime.. but today, it's a blouse with an all too familiar shape! 
The story starts with 1.2m of Liberty Saville Poplin (Strike pewter green) from the Fabric Store. It is, as you would expect a heavier weight than the Tana Lawn which I was looking forward to using for perhaps a thicker drape.  I have quite a lot of Japanese pattern books (which I'm thinking of destashing) and haven't made anything from quite a few of them, so thought it was time to mix up my peplum game and make the pattern 2nd from the left in the photo:  The cropped top with pleated peplum (aka N: half sleeve short blouse).   It has a pleated peplum at the front only.

Warnings from Jillian that the top is very cropped came a little late as I had already cut out the 'peplum', but thought that my extra inch or so would be enough. It wasn't. I'm only 5'2" (or perhaps a bit less) but the top looked - urrrgh. Just not right.  It wasn't just the length, it was also the pleats that just weren't working for me. I tried it with my higher waisted culottes but nothing jelled.
Amazingly, this top uses the most miniscule of fabric so I was able to remove the pleated peplum and add a winning gathered peplum from the remaining fabric.
Yes, this is the third such gathered peplum top in my wardrobe, the first was my wildflowers (which has a lower peplum) and the second was my Marthe (with a much wider neck).  And you would be right... but there a minor differences in each and lets face it when you like a style, you like a style. 
What I'm loving about this is the higher waist and longer peplum.. and... always a fan of the closer neck, I like the shape better there as well.  The wide neck always bothered me on the Marthe.
The neck is finished with a facing (which I didn't interface) and a button closure. It was definitely nice to do a facing for a change rather than binding, although I wonder would I just bind it next time.
 
All in all, this was defnitely on it's way to being a make that I was never going to wear to something that I now love!  Hooray for peplums!  


FINISHED! A sketch magellan

My love for the ruffle has no bounds at the moment and my latest make - well finished a month ago - was the new at that time Magellan blouse by Aime Comme Marie. Aime Comme Marie are another French pattern company that I'm smitten with, who provide for us French language amateurs, a page of English translation of the pattern at the back of the printed booklet.  It was my first time making up one of their patterns and am now keen to continue working through  their catalogue.
Image result for sketch a liberty fabric
I used Sketch A from the Spring/Summer 2016 Liberty collection.  Of course.
All the photos here are with the shirt out, but in fact I probably wear it most tucked into my Esther Shorts. It's the perfect blouse for them, and hence now I'm on the job of making some longer Esthers for work to suit my wardrobe of ruffle blouses.
I made up my standard size 36. The one thing I love about all the French companies that I've sewn with is that the sizing is standard and it reflects the standardised clothing sizing that I also see in France. In Australia from one shop to another I feel like the sizing is different and the sizing for patterns is also different. I never seem to have to really think with French companies - or Pauline Alice patterns. Anyway I digress. 
As has become my habit, I lengthened the sleeves slightly to below the elbows. The sleeve heads have an unusual (well to me) two darts. To be honest not sure I'm won over by the two darts at the sleeve head. It feels a bit fiddly to me and certainly doesn't add to the fit of the sleeve. It's not awful but I wonder if it's really necessary. Have you seen such a thing before?
I only had two buttons at home that I liked in the stash, so went with only two buttons on the back. The ruffle was easy enough to put on but I wonder if next time I might make it slightly wider.  All the finished Magellans that I've seen made up have an overlocked edge, but I find that slightly messy, so did a tiny rolled hem on my machine - which meant that the width of the ruffle is probably slightly smaller than it could be. 
So all in all, another fab ruffle make which is in high high rotation. And it won't be the last!  Do yourself a favour and go and search for the other great Magellans out there... my favourite is this one!  Oh this has to be copied! Until next time, bon ruffles!

FINISHED! Abbey Pool Hero Vest

Sometimes things just fall together and this is one such make. Spoiler alert: I love this make and it is currently my hot tip for my make of the year. But.. there are 4 months to go so I best hold my betting til closer to the end when all the finalists are in. It has been a long time since I have been so excited by a make - I was desperate to sew a bit everyday until this was finished.
Let's start at the beginning. One of my favourite makes of this year was Jo's vest which has been sitting in my subconscious since she posted it. I adore it.  Oh that fur collar and pre quilted fabric. It is super cool.  The second thing was that I saw a dress recently made by Christine out of Liberty of London Abbey Pool and I was reminded that I had failed to buy this fabric, and that it was currently available online from Tessuti. So I quickly remedied my missing Liberty. Lastly, Toni from Make it Perfect released the Hero Vest for Women. She quickly thereafter released additional instructions to the pattern to provide for a hidden zipper. Boom. I knew right then that I was going to quilt the Abbey Pool for a vest. I had bought the fabric for a dress, but as soon as it arrived it's new destiny was confirmed.
A quick note about the fabric. It is Liberty of London Abbey Pool and is from the Spring Summer 2013 The Flower Show collection.
The Botanical Garden capsule collection was been digitally printed and features designs by eminent artists Mary Fedden, Hugo Grenville and Rachel Pedder Smith which sit alongside artworks by the Liberty Art Fabrics studio and freelance designers.  Abbey Pool is by Mary Fedden OBE, a Royal Academician and has had many exhibitions and commissions. Mary was the first woman to teach painting at the Royal College of Art, where one of her students was David Hockney. Mary Fedden’s art concentrates on the pre-occupation of the still life with a view beyond.
  
Back to the vest. The sewing of this wasn't too hard except for maybe the zip, but we'll get to that. I self quilted the fabric which was rather therapeutic (though I won't be doing this again in a hurry!). I roughly cut out each pattern piece - with about an extra inch added and then quilted simple lines 1 inch apart. Once I had everything quilted I cut out the patterns according to the pieces. This is a XS and I did panic at one point that I should have made a bigger size but I'm ok with the fit.  I took about 2cms off the length of it. The whole thing including the hood is lined in a navy cotton.
I added an inside pocket piece to make it neater inside as I didn't want the batting to be visible from the inside. All the versions of this pattern that I've seen have contrast ribbing for the pockets, arms and hood. I used simple self made binding rather than ribbing as I was after a simpler look and I'm really happy with how they turned out. For the hood and arms I hand stitched the binding down because I'm not super confident machine stitching the binding down and I wanted those parts - that are visible - to be as neat as possible.

Ok the zip.  I was so happy when Toni released some additional instructions to make this zipper hidden. The pattern comes with instructions for just having the zip seams exposed on the inside and so I was planning on working out myself how to hide the zip, so happy I didn't have to do that.  I worked really hard to try and match up every quilted line on the zip. I used chalk to mark the lines on the zipper which worked pretty well. If you look really close - please don't - there are a few little places that aren't perfect, but I unpicked so many times to try and get it lined up that I ended up with this as my best and final. I'm pretty happy and proud of my effort with it and I won't wear it zipped up much so I'm not going to worry about it anymore.  I didn't top stitch the zipper down as I was worried that this might get a bit messy.

Not much more to say about this except WOOHOO! It is the perfect vest moving into spring and of course goes perfectly paired with my neutral (stripes) and I can't help but feel a bit proud of myself with this one. 

FINISHED! An Oxford Blouse

When the Spring Summer 2015 Pictures and Conversations Liberty fabric collection was released I was immediately drawn to the garish colours of Oxford A.  I then proceeded to go on holidays and delay any Liberty fabric buying until I returned. Several months passed and I still hadn't caught up with the latest Liberty release. The shame! But I was quickly kicked into action when I saw Tilly's pussy bow blouse (in colourway B) and Anna's top. Both reminded me how much I liked this print.   
Liberty Art Fabrics Oxford A Tana Lawn Cotton
Here is the print story from Liberty:

'What is the use of a design collection', thought Alice, 'without pictures or conversations'. And in another moment she was considering how in the world to create one.'
'Pictures and Conversations' celebrates the 150th anniversary of the first publication of Lewis Carroll's 'Alice's Adventures in Wonderland'. Both design and colour were inspired by pictures and conversations within 'Alice's Adventures in Wonderland' and 'Through the Looking Glass' and experiences related to them.

Oxford Liberty fabric is inspired by a trip to Oxford and is created from Liberty scarves from the late 1960s. These have been blended with personal experiences obtained when the in-house design studio were fortunate enough to have a private guided ‘Alice’s Adventures in Wonderland’ tour around Christ Church water meadows and the streets of Oxford, lead by expert and author Mark Davies.

'Alice was beginning to get very tired of sitting by her sister on the bank, and of having nothing to do.' – Lewis Carroll

The print is not for the faint hearted, so it wasn't immediately obvious to me what I would make up. My love affair for the Clean and Natural peplum hasn't cooled and I have been thinking for a long time of making the Gathered Blouse from She has a Mannish Style (aka She Wears the Pants) so my mind started playing with the two patterns. I didn't want anything too complicated with this fabric, but I was yearning for a little bit of interest.
Alove child blouse between the two patterns was born. I used the bodice and sleeves from Clean and Natural with the hem line and sleeve cuffs from the Gathered Blouse. I did just a simple pleat on the sleeve. 
The back closes with a self covered button. I think I probably could have provided a little more length, but this seems to be an achilles heel as I'm constantly saying that about the length of my tops. As a result it has a teeny tiny hem.
I really like this and wore it with skinnier pants for work on Wednesday, where I think it was a winner.  A bit short yes maybe, but a winner nonetheless. I just can't get enough of the dropped sleeves and high neckline of this pattern.  But for now I'll have to park this pattern as I have a CBR frocktails dress to dream up.

FINISHED! Eliana and Kevin

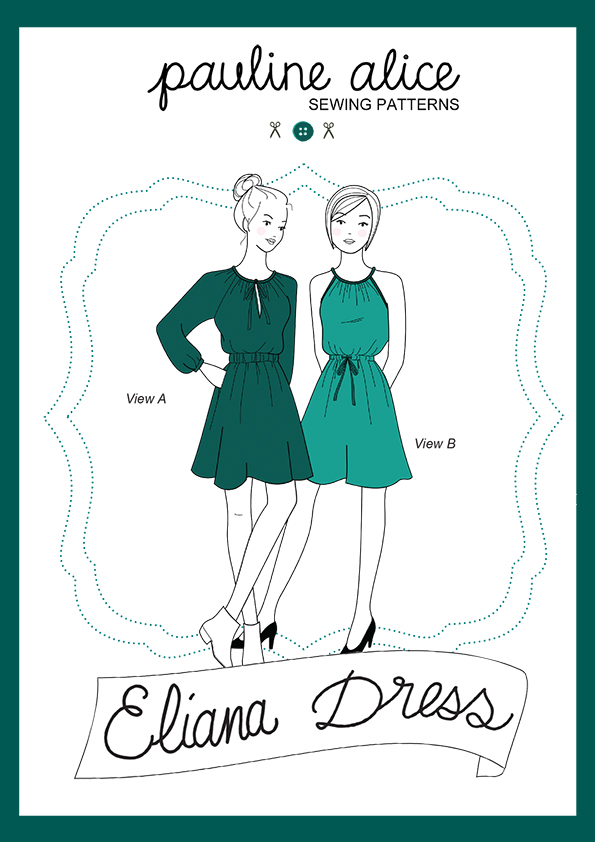
Today, I get to talk about a dress I made all the way back in October as a pattern test for Pauline Alice. You all know that I am a fan of Pauline's patterns and so when the opportunity to test a new one comes up, I jump at it.  This one is her new Eliana dress.  A wonderful, raglan cut dress with two options, one with sleeves and the other - a very flattering summery version. You can see a super summery version over at Lizzie's.
But, first it's made from Liberty of London fabric, so lets quickly talk about the fabric.  As usual with me, I threw caution to the wind and used a Liberty that was in my stash. High risk testing! The design is Kevin (colourway B) from the Liberty Art Fabrics Collection Autumn Winter 2014.  I have fancied this fabric for a while and ended up buying it from Shaukat back in August 2014. It sat in my stash for a little time until I was asked to pattern test the Eliana dress. Inspiration.
Liberty Art Fabrics Kevin Tana Lawn
Fabric Story:
Kevin Liberty fabric was based on the celestial ceiling art in the hallway at Mount Stuart in Scotland. The constellations in the print were hand drawn in white and grey chalks on black paper to create a conversational starry night.

There is something about wearing this fabric that makes me want to pull out the latest trash magazine and read my horoscope!
Anyway, now to the important part, the dress.  The dress comes in two versions, the one I tested has a gathered neck tied with binding, an elastic waist and raglan sleeves.  I love a short dress with long sleeves, even in summer, so the choice for me was obvious!  I think that it would be trivial to replace the elastic waist with the ribbon tie which is used in the summery version.  Of course raglan sleeves provide such an opportunity for colour blocking.  And for pocket lovers, there are pockets!
As this was a test version I had a few adjustments to make with the length of the bodice and sleeves. I finished making it according to the instructions, but then found that the neck was too wide for my liking and that the sleeves hung too low due to the raglan design.  Before my next wear, I unpicked the binding collar, regathered and re sewed. I think these adjustments have been reflected in the pattern and this small change made this a much better fit for me. The photo above was taken before I redid the neck.
I really like this dress and before coming on holidays, wore it weekly to work. It is a slightly different silhouette (at least the bodice is) for me, but one that I definitely enjoy wearing. I think that it would look fabulous made up in a slightly heavier fabric as well for cooler months, with tights, so there might be another version somewhere in my future!
Lizzie is having a giveaway of the pattern so pop over there, not only to see her great version but enter in the giveaway.  Well, just a few more days of holidays for me now and I'll be back in Australia next week, where I hope to start on some new garments for 2015!

FINISHED! A Liberty Atrium Nightdress

I made a few things for our trip overseas, this dress and this hoody which have both been seeing quite a bit of wear, but always after 4 weeks into being away, the clothes I take start to feel pretty tired and you long for something that isn't on high rotation. Not so, my third make which is just a simple nightdress I made using Liberty of London Atrium.  I bought this fabric from Shaukat early last year and not really knowing what the colour-ways would look like in real life I ended up buying two colour-ways (!). The other colour-way, is a real favourite which I made up into a Kanerva , but this one is just too pale for me to make up into day wear, so just days before we left I whipped up this simple nightdress.
The pattern is from a Japanese Pattern book that I've had for a while and I used the 'Lesson 1' pattern. I have made this pattern up before as a top.  It's an interesting design feature because the pintucks just 'flap about'. But I like it.

There really isn't much else to say is there. The pattern is perfect as a nightdress and it goes great with my lounging Liberty Kimono!  The total Liberty lounging (sleeping) ensemble.

FINISHED! Snuggly Saxby Dress

I bought 1.5 m of Saxby (colourway B) Liberty Linford Fleece from the Workroom back in the middle of winter here and because it took a little while to come all the way from Canada, once it arrived, I had moved onto Spring sewing.  Funnily enough with temperatures in the mid to late 30's on Friday, I became 'winter inspired' again and decided my next project was going to be to cut into my precious fleece.  It's not all madness as we are off to France for 6 weeks in December, so my mind has turned momentarily to what I should make/pack for the trip and today the temperature plummeted so it was perfect weather to sew up a cosy outfit. 

This is my first ever piece of Liberty Linford Fleece and it feels so snuggly. Oh so cosy! The print is Saxby and is from the Liberty Art Fabrics Collection AW 14.  The design was inspired by the decorative bird life at Mount Stuart in Scotland, in particular the parrots in the drawing room. To design the print, the birds were painted onto canvas in a loose, free style, and then merged to create a rich feather texture.
When I bought this piece I really didn't know what I was going to do with it. I don't really sew that much in fleece (although I also have another piece of Liberty Linford Fleece so watch this space!), but inspiration struck and I've sewn up a dress. I probably could have just sewn it up as a Coco, but instead I pulled out my hacked Kanerva I used to make my frocktails dress and used that as the base.  It is a medium/heavyweight with no significant stretch so I sewed it up with the darts and everything. 
I added navy ribbing to the neck and wrists, to make it even more snuggly. I worried that maybe it made it too sporty? but I kind of like it. There isn't really anything else to say about the construction, other than I added vilene bias tape to the hem for stability which worked a treat and then I double stitched it. I haven't top stitched the neck down but I'll see if it needs it.
Will it get packed in my suitcase for France? It might. It's snuggly, warm and comfortable and goes with my boots!

FINISHED! Ciara Marthe Blouse

The new Republique du Chiffon pattern, the Marthe Blouse was released last week and it quickly sky rocketed to the top of my sewing list. I adore the lose peplum style and while it is not dissimilar to the top I made from Liberty Wildflowers a few months ago, which had turned into one of my most worn tops, I thought the raglan sleeves might add interest and I was interested in making a top that had a higher neck. I was taken in with the line drawing and the fabulous photos.
 
I chose a Liberty that I had in the stash, which I bought on a bit of a whim when the latest collection was released called Ciara C.  The Ciara design was originally for a scarf in 1969 and has been recently redesigned for the Classic collection.   
The pattern only comes in pdf, which is fine by me and the pattern is in French, but don't let that stop you as there are plenty of pictures and this is a very simple pattern, so I didn't always use the instructions.  Like all the RdC patterns, it is necessary to add seam allowance. 
The pattern back is cut in two pieces and the pattern calls for either an invisible zip or a button at the neck. Given the closure requirement (and the line drawing), I was expecting that the neckline would be much higher, thus requiring a button, but on trying it on I realised that the neck was wide and definitely did not require any fussing around with closures. I simply sewed up the back seam. Unfortunately while I didn't need the closure this meant that the neck was not at all what I was hoping for.  I really wanted it to be a smaller round neck which would act as a contrast to the volume. Oh well, it's not bad how it is, just not what I had wanted.   
I sewed the arm seams up a little smaller to try and take some width out of neckline. I also took an inch and a half out of the length of the bodice, bringing the skirt seam up. I really like where that sits. I took about 2 inches off the length of the sleeves but I find myself wanting to push my sleeves up even more so perhaps I should have made them just a tad shorter.  
Rather than gather the 'skirt' traditionally using 2 or threads, I used my overlocker. This worked ok, but I think I'll be going back to the gathering method next time.While I hate pulling those threads I feel as if the gathers look a bit pleated on this make. 
Have you been participating in Amanda's #bpSewvember on instagram? It has been so much fun and there is still more than half of November to go! I  The other day we had to do our #favouritefinish and Jillian said her favourite finish is a Woo Hoo finish. What a great interpretation. Sadly, while this is a fun make, the fabric is fab and  I'll wear this during summer with my Iris shorts, it isn't exactly the woo hoo finish I was hoping for. C'est la vie!