Showing posts with label pauline alice. Show all posts

FINISHED! Rosari pineapple skirt

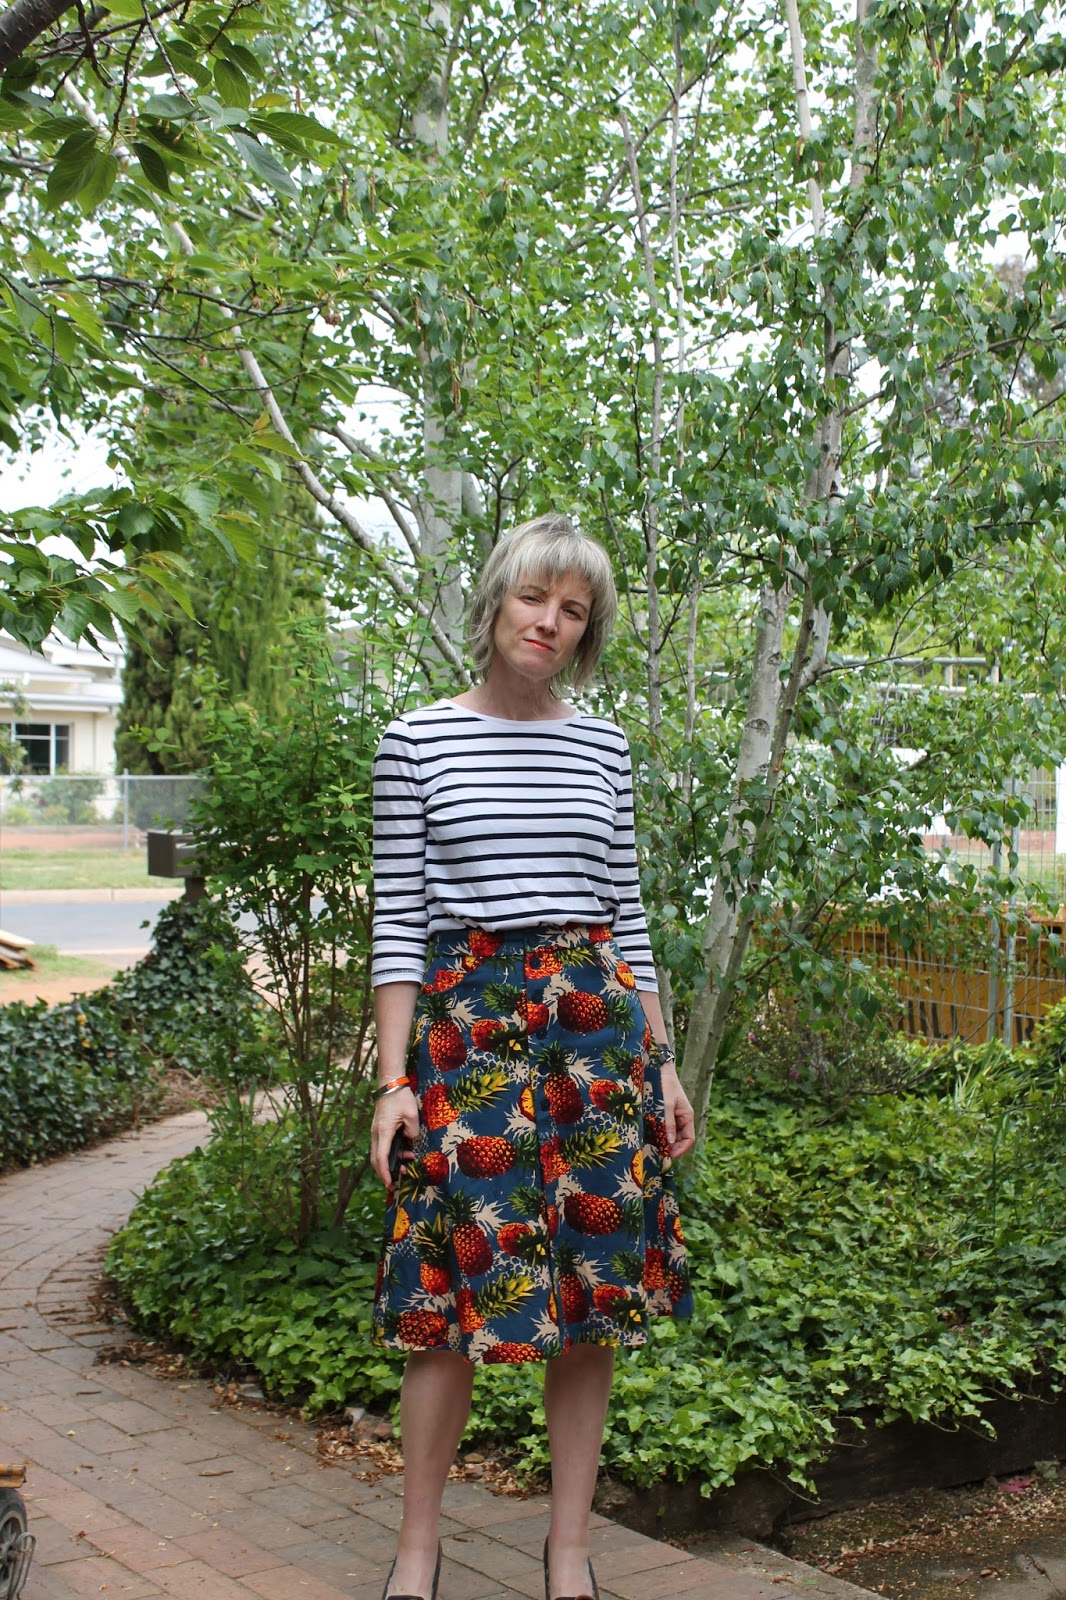
My sewing and blogging has slowed down a bit since our house renovations but I managed to find some time and space to test for Pauline Alice again. This time the Rosari, the long awaited skirt to her library of patterns. 
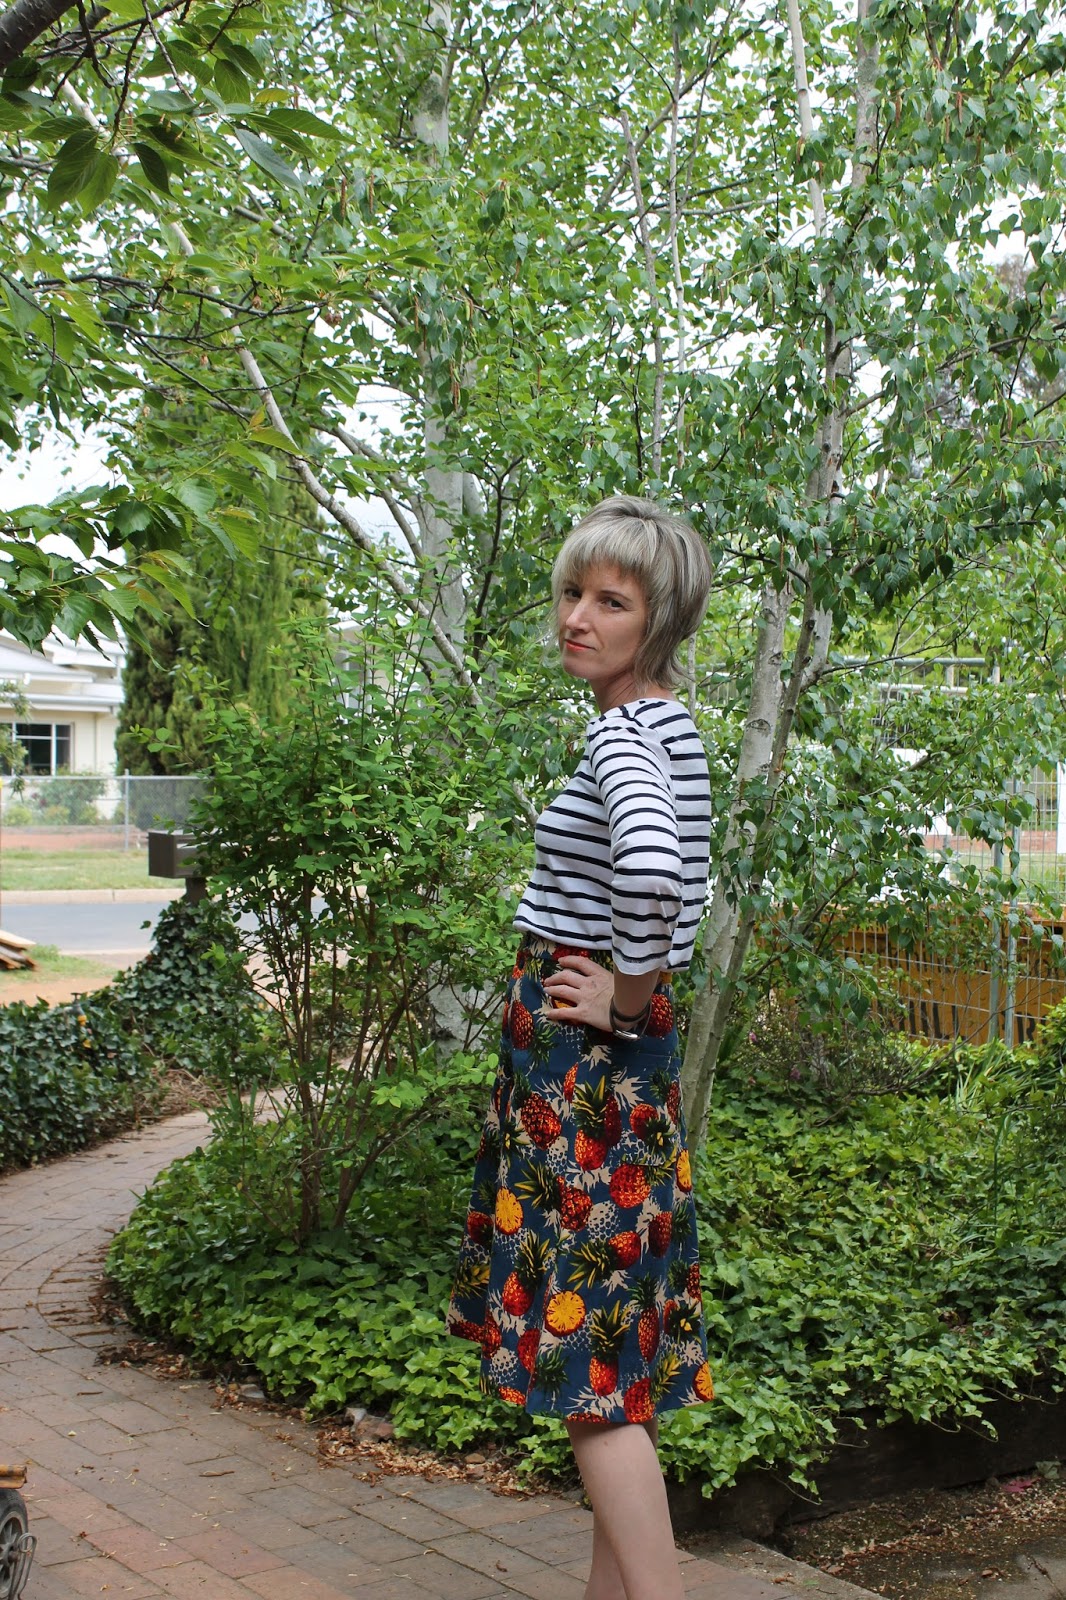
The skirt has a cool 70's vibe and has lots of different variations: 2 lengths (mini or midi) and 4 different types of pockets to choose from.  I chose the midi, although I think for a midi it could be a bit longer so keep this in mind. I've said it before, but I'm only about 5 foot 2 inches. I'm wearing heels in these photos. 
I went with pocket A for the front and pocket B for the back. The skirt has all 12 buttons but I just haven't done them all up!  I really like this skirt pattern and plan to make a slightly longer one in denim. I'm so attracted to white denim this summer - but haven't yet succumbed because I'm not sure whether it would stay clean for even a minute.
There isn't really much to say about this skirt construction. It comes together easily, with nothing too tricky, well with my pocket choices anyway.  Annie Coton has done a super tartan mini version.
The fabric? Well I love this fabric which I got from Addicted to Fabric. Have you seen Barbara's jeans in the same fabric? Unbelievable! Anyway, despite loving the skirt and fabric,  I decided to gift it off to a young friend who sometimes babysits for us. I hope she gets a load of wear out of it because it deserves to be loved.
I'll be back soon with another make x

FINISHED! Denim Xerea dress

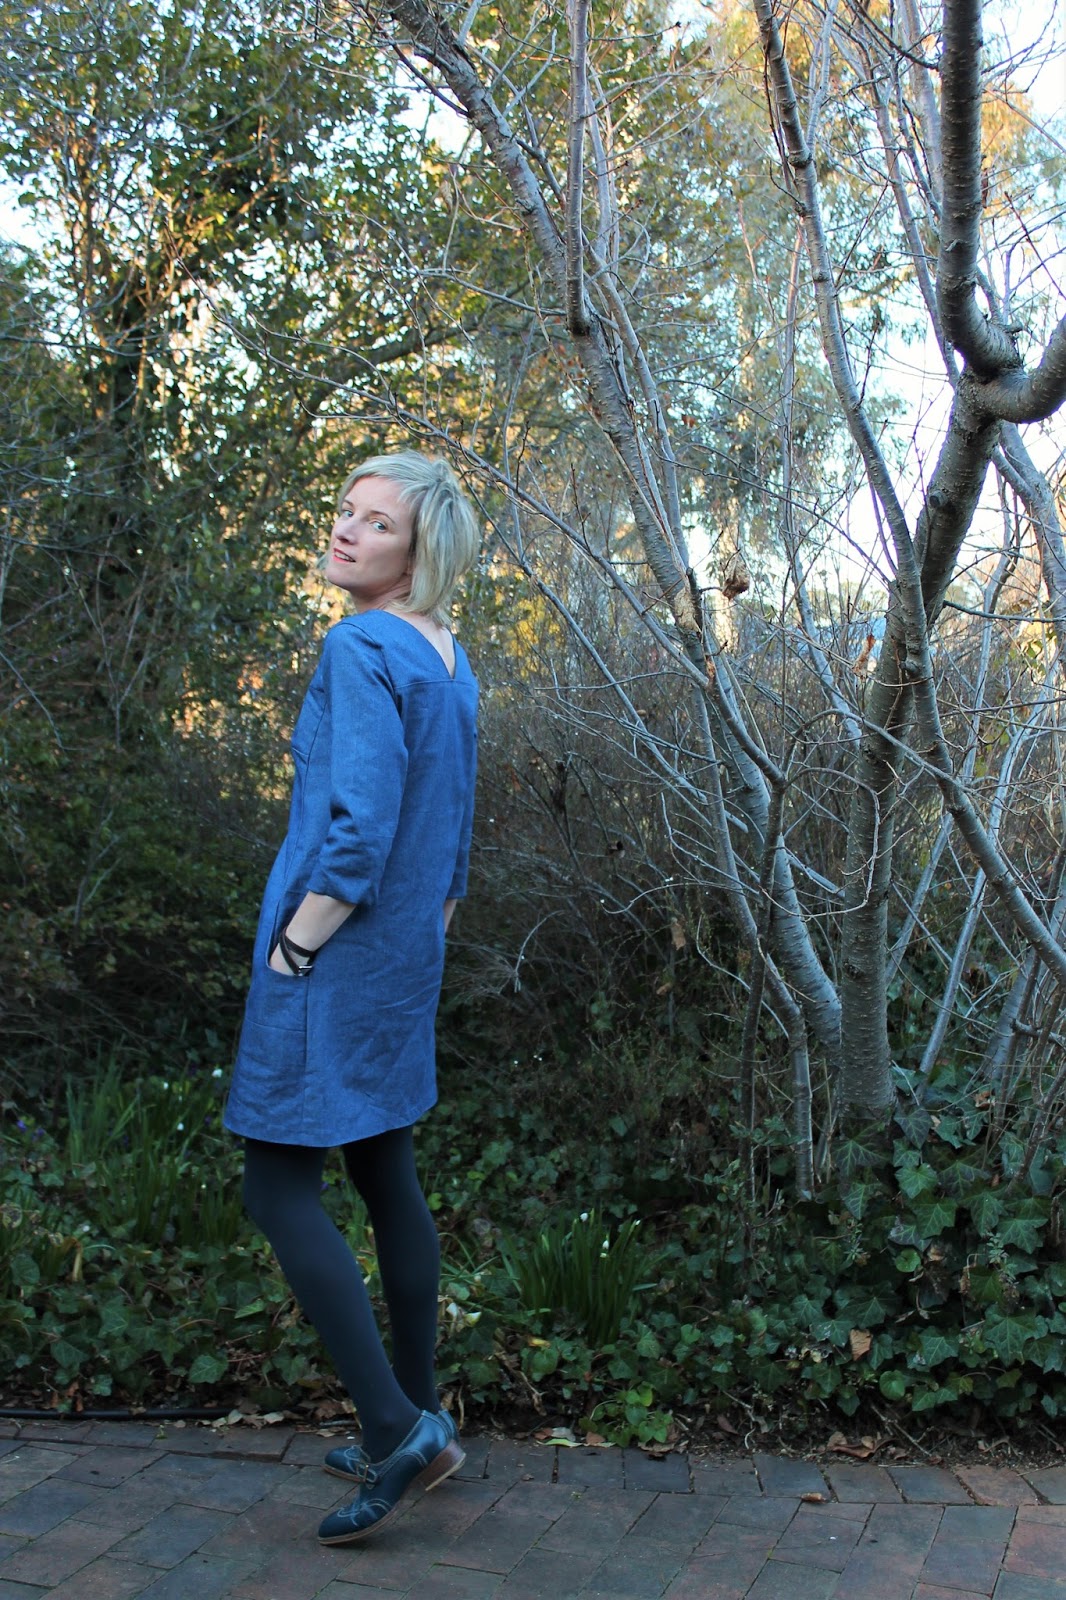
This last weekend I was supposed to go to Frocktails in Melbourne but given my son was sick (he is much better now) I cancelled at the last minute and found myself at home and itching to sew for the first time in ages.  I decided to start the new Xerea dress by Pauline Alice. I bought some light coloured denim from Addicted to Fabric (the last of the roll) and before I knew it, I'd finished it and if I could I would have worn it everyday since!
I love wearing patterns, but I adore almost as much, a simple denim dress. An attempt to channel some understated Alexa Chung cool perhaps. You may remember that I made a denim dress last year using the sigma pattern but while I love it to look at, I just haven't worn it. There is just too much bulk in the top back, made worse by the weight of the denim. Given that denim dress is destined for the charity bag I felt justified in making another one for my wardrobe. 
I made view A, lengthening the sleeves to 3/4.  I just prefer a longer sleeve and makes this seasonally perfect. Originally the sleeves were longer but after taking some photos on Sunday realised that they were just a bit long so took another inch or so off.   I intend to wear this to work (which I did on Monday!) so I didn't make it too short so that it would still be reasonably decent with higher shoes or when the spring comes and I'm not wearing stockings.
The suggested fabric is light to medium weight, so the denim does hang a bit heavy. You can see this in the photos where there are extra shadows. But I don't mind it and in real life I think it's fine. I did iron this before the photos but there is something about this fabric that like to crease and there are two  deep horizontal creases in the fabric which I will need to work harder to get rid of. 
This is a hugely satisfying make. It's oh so quick! The fabric was bought and washed at lunch and it was made by 6pm.  It helped of course that I didn't have to make any adjustments.  My favourite part is the binding on the neckline- sewing it on before closing the back up. I'm not a big fan of putting binding on, so gosh this just makes it so much easier to do! It also helps that the back pieces are straight!
The other great thing about this pattern is the small v at the back, which means it's a high neck (something I also love) but you can just slip on with no closures. I made a small mistake with attaching the back -  I couldn't get the the pieces to make a point. Accidental design feature! The V also adds a nice bit of interest to the back.
Oh and of course the pockets. The lines are great, which you can't really see from the photos but go back and check out the line drawing. And they are easy to put together (there is also an additional photo tute on Pauline's website).

I'm a huge fan of this dress - and fully expect to make up more!

Check out more cool Xereas: Inna and Sonja  and Lindsay have also made super versions

FINISHED! Denim Sorell Test Trousers

Pauline Alice has once again released some fantastic new patterns, a super cute shift dress, the Xerea dress that I will definitely be making up soon and a pair of wide leg pants, the Sorell.  Pauline asked me to test the Sorell trousers a couple of months ago, so I went all out and pushed myself with View A which has welt pockets and a cute little watch pocket.
The pattern description: The Sorell trousers feature a front zipper fly, wide legs with front pleats for more comfort, front slash pockets and a small watch pocket. The waistband sits at natural waist and has belt loops. View A has classical welt pockets, perfect for a chic pair of trousers.  View B is a more casual version with patch pockets.
You saw a sneak preview of these pants in my last post on my Caramel Sydney.  Originally I bought some wool, but while it was at the dry cleaners I realised that I probably didn't have enough time to wait for it to come back in time to meet the testing deadline, so cut into this denim from Addicted to Fabric that I had been saving for another pair of dungarees.
There are a lot of lovely little details on these pants that make them an interesting and slightly challenging sew.  I made up a straight 36 in the denim with no changes, except taking off a few inches initially for the length as the pattern is designed for heights of 5'5" (165cm).  The trousers look so great on Pauline long (and she is the same height as me I think) but for me I felt a bit swamped in them, and not my usual style, so no surprises I decided to chop them off to be more of culotte/gaucho length. 
I think the fit is pretty great around the waist and the bottom. I have a pretty 'flat ass' but these pants fit nicely.  I'm less happy with how I've got them sitting at the front - there's a bit of, well I'm not sure how you describe it, but it's not super flattering. I look at Pauline's version and they look just so great on her but not so super great on me. They seem to sit higher on me - I think my torso must be shorter. These are only a test version so I think I could get them better on the next version. I think partly my pleat isn't in the exact right place. 
Pauline is consistently putting out lovely patterns and this is definitely one of them! Are you thinking of making up any of the new Pauline Alice patterns? If you do there is a new blog for all the great Pauline Alice makes: Pauline Alice and You!

P.S. wearing Pattern W from Les Couleurs Francaise, in Liberty Wiltshire.

FINISHED! Eliana and Kevin

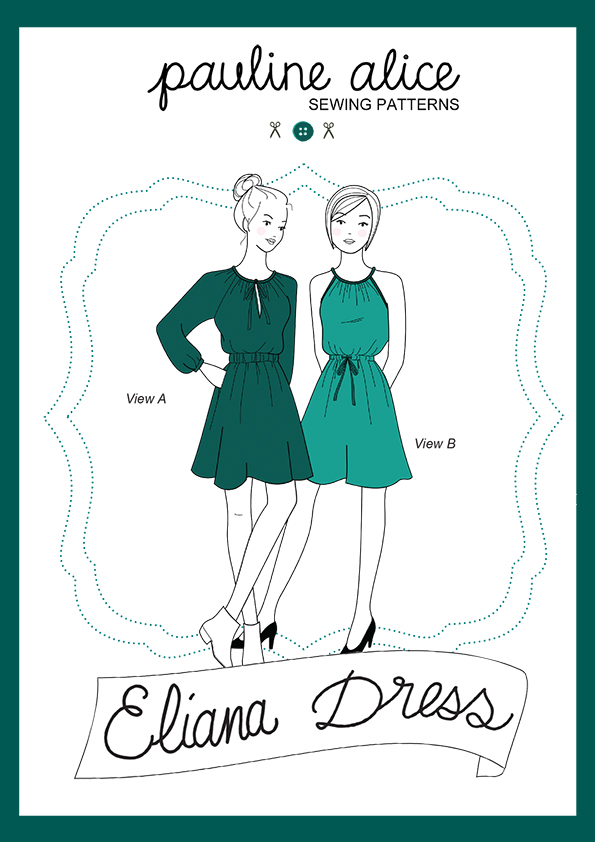
Today, I get to talk about a dress I made all the way back in October as a pattern test for Pauline Alice. You all know that I am a fan of Pauline's patterns and so when the opportunity to test a new one comes up, I jump at it.  This one is her new Eliana dress.  A wonderful, raglan cut dress with two options, one with sleeves and the other - a very flattering summery version. You can see a super summery version over at Lizzie's.
But, first it's made from Liberty of London fabric, so lets quickly talk about the fabric.  As usual with me, I threw caution to the wind and used a Liberty that was in my stash. High risk testing! The design is Kevin (colourway B) from the Liberty Art Fabrics Collection Autumn Winter 2014.  I have fancied this fabric for a while and ended up buying it from Shaukat back in August 2014. It sat in my stash for a little time until I was asked to pattern test the Eliana dress. Inspiration.
Liberty Art Fabrics Kevin Tana Lawn
Fabric Story:
Kevin Liberty fabric was based on the celestial ceiling art in the hallway at Mount Stuart in Scotland. The constellations in the print were hand drawn in white and grey chalks on black paper to create a conversational starry night.

There is something about wearing this fabric that makes me want to pull out the latest trash magazine and read my horoscope!
Anyway, now to the important part, the dress.  The dress comes in two versions, the one I tested has a gathered neck tied with binding, an elastic waist and raglan sleeves.  I love a short dress with long sleeves, even in summer, so the choice for me was obvious!  I think that it would be trivial to replace the elastic waist with the ribbon tie which is used in the summery version.  Of course raglan sleeves provide such an opportunity for colour blocking.  And for pocket lovers, there are pockets!
As this was a test version I had a few adjustments to make with the length of the bodice and sleeves. I finished making it according to the instructions, but then found that the neck was too wide for my liking and that the sleeves hung too low due to the raglan design.  Before my next wear, I unpicked the binding collar, regathered and re sewed. I think these adjustments have been reflected in the pattern and this small change made this a much better fit for me. The photo above was taken before I redid the neck.
I really like this dress and before coming on holidays, wore it weekly to work. It is a slightly different silhouette (at least the bodice is) for me, but one that I definitely enjoy wearing. I think that it would look fabulous made up in a slightly heavier fabric as well for cooler months, with tights, so there might be another version somewhere in my future!
Lizzie is having a giveaway of the pattern so pop over there, not only to see her great version but enter in the giveaway.  Well, just a few more days of holidays for me now and I'll be back in Australia next week, where I hope to start on some new garments for 2015!

FINISHED! Splattered Turia Dungafores

A few weeks ago the very lovely Mel was visiting Canberra and a few of us were lucky enough to catch up with her for a little bit of local shopping at Addicted to Fabric. It had been a while (days? weeks?) since I'd been to Addicted to Fabric and so there was quite a few new pieces of fabric to peruse. The one that caught my eye was this one called Ricochet. (97% cotton, 3% spandex). At first I thought I'd make a dress out of it, but it is quite thick and very quickly my mind turned to the pinafore dungaree, which Pauline had just done a tutorial out of the Turia pattern. Egged on by Amanda's new coined phrase, the dungafore, I was on my way, crossing off the current trends of painted fabric and overalls all in one hit.
This week I finally got around to making them.  Well, correction, this week I became obsessed with making them. Every night I sewed for hours, quietly chipping away at them, fluctuating from love to fear back to love. Would they be too 'out there', 'not age appropriate', blah blah blah. Now they are finished I love them. (Although after looking at a lot of photos taken of me wearing them I wish I'd got that print placement a bit better in the front !!! Damn!)
I made this pattern, the Turia up in the long version previously as a tester.  I love those and wear them on the weekend heaps, but it's not my best sewing so on these I made sure that the stitching on these is much sturdier. I ensured that I overlocked every edge, rather than just folding and stitching.
I also cheated a little bit and I only did fake flat felled seams: stitching the seams together, overlocking then double stitching in place. This is easier but the main reason was that I can get a much neater finish on the outside with my twin needle.
I like my dungarees a bit loose so after reading that Sasha (via Ninie (who also made the cutest pair of short dungarees)) didn't need a zipper in hers I decided that I didn't either. They pull on easily because of the stretch in the fabric.
Pauline in her tutorial reminds you to add extra length onto the pattern if you are making a pinafore, but clearly I didn't add enough on.  Ben liked it the length it was, but it just seemed way too short, even for me who doesn't mind showing the old pins.  I rectified this afterwards, with a design feature additional panel to make them more a decent length!
I am super happy with my dungafores (print placement aside) and cannot wait for the weekend to come around so that I can wear them, with any number of striped tops in my wardrobe(!), my favourite neutral, before this fad disappears.

FINISHED! Turia Dungarees/overalls

I am bombarding your inboxes this week but I have another fun finished outfit to share and I couldn't wait any longer. I've been lucky enough to once again test for Pauline Alice.  Last year I tested the Carme blouse and this time around it's a pair of overalls / dungarees the Turia!
Pauline has style. Seriously! I didn't realise I needed a pair of overalls in my wardrobe until now.  I I love these overalls, they are cute and just so so wearable and they make me feel like I'm back at university :)
Let's talk about the details. I had a week to sew up this test version so I bought some chambray from Addicted to Fabric (yes the leftovers went into my Top Victor).  I was a bit nervous as I haven't made that many pants and there is a lot of topstitching on these, including new to me flat felled seams.  You know I love to hide my sewing in print, but I knew that if I wanted to make something that I would want to wear after testing (assuming they worked out) then they would have to be in chambray.
 
I made a size up to what I usually make (I was worried unnecessarily about the fit at my waist). The fit is spot on and there is a nice bit of room in the waist. The overalls close with a normal zip on each side (but you could easily do an invisible if you wanted - not me!) but I only need to use one for getting in and out.  I didn't make any other changes to the fit.  During testing I made a minor suggestion that the pockets could be a bit bigger on the bottom.
Overalls look like a complicated make, but I was surprised at how easily they came together. There are a few pattern pieces, lots of topstiching  but it was methodical and actually a fun make.  And I was pretty excited as well to hammer on my first bit of hardware.

Many of the seams are flat felled and the pattern comes with some simple instructions on how to do them. I found getting the stitching nice and even difficult on the flat felled seams, even with my edge stitching foot, but overall I'm pretty proud of the make and the stitching is pretty good. I used a twin needle whenever I could on the pockets.

The only area of issue was in the crotch stitching of the flat felled seam...but no one is going to see that.  Oh and I stupidly cut a small hole into the front seam of the pocket as I was flat felling. Doh.
I really like this pattern  and I'm so happy that this version worked out. I've already braved cold weather to wear these a few times with my boots and I am getting them ready for a high spring rotation. By far my favourite combination is the Pauline Alice double: turia overalls and carme blouse

FINISHED! A Daydream Carme Blouse

Early in February I was very honoured to be asked to test the new Pauline Alice pattern, the Carme blouse. I jumped at the chance of course.  I am such a Pauline Alice fan girl (having made both the Cami dress and the Malvorosa dress and the Ninot jacket is sitting high on my to do list).. and well a blouse is actually my favourite thing to sew.  Knowing that it was a pattern test I probably shouldn't have used one of a Liberty fabrics, but life is too short to not sew with beautiful fabrics and mistakes are so well hidden in a Liberty print.
More on the fabric later, but now to the most important part, the pattern. It is gorgeous isn't it! There is so much to love about this pattern. The pintucks on the front bib, the button cuffed sleeves, the rollup tabs and the stylishly slim fit, allowing it to be worn out or tucked into skirts.   
I cut a straight 36 with no adjustments at all.  The pattern comes together well (I love the way you pintuck and then cut the bib) and the sleeves set in perfectly. Pauline provides good instructions but she has also produced some video tutorials to assist even a beginner sewer, so there is no excuse not to try it. The pattern has also been updated to include a fabulously easy way to attach the collar which I'll be using for my next make.
I have worn this top already many times since making it.  Just a couple of things I'd take more notice of next time...  The instructions give you the option to interface or not the collar, so I took the middle ground and only interfaced one side of the collar. In hindsight the collar would have sat better, in this fabric, if I'd interfaced both sides.  
Sadly, in testing I made a small error and can't quite get my collar to do up with the buttons I have which is annoying and I couldn't find any slightly smaller buttons that I like. As a result when I got to the buttons I had a bit of a hopeless moment..first, I thought I wouldn't put any buttons on it. Then I thought 3 and the opening, then I thought more,..but by then I'd cut the button holes and the amount left at the top isn't exactly even.  Aaah. So annoying, but really, with the buttons undone, which is how I wear this top, it isn't at all noticeable (thank you busy Liberty fabric).  But my next one I'll get right as I'd love to be able to wear it all done up.  

Lastly, inserting the bib into the front requires precision and spot on top stitching. I need to up the ante next time and use my blind hem foot or something to provide guidance for immaculate top stitching so I'm not tempted to keep unpicking a less than perfect result. 
Despite those little things, I really enjoyed making up this pattern and look forward to making it up again in a denim/ chambray. For an amazing version, go and see Merche's version. It is stunning and then go and buy the pattern here!

Lastly, back to the fabric.  I bought this fabric from Tessuti after being lured into purchasing it from Velosewer Maria after spotting her purple colourway on instagram.  No regrets with the purchase of course.  As soon as I saw the line drawings from Pauline I knew this fabric would become a Daydream Carme Blouse.  I am a big fan of the work that Mo Coppoletta did for Liberty last season having made the Cami dress out of his Joy and Sorrow print and still have some Growing Fonder in the stash.
Daydream is from the AW 13/14 season and is hand painted by Mo Coppoletta who was inspired by William Morris and the Arts and Crafts movement, a style that represents Liberty, as it is a Mecca for Arts and Crafts visuals. Peonies were chosen as they are known as 'the king of flowers' in Eastern tradition and defined as the flower of riches and honour bringing health, wealth and wisdom. 


FINISHED! An Icelandic Malvarosa

I've just finished Pauline Alice's latest pattern, the Malvarosa.  What can I say, I'm a sucker for a drop waist so when this was released I was very quick to buy it.
Malvarosa Dress in Liberty of London Ranga
This Malvarosa is made up in Liberty of London Ranga A, which is from the Liberty Art Fabrics AW 2013 Seen Collection.
Untitled
From the Liberty website:
This collection was Inspired by William Morris’ poem; ‘Iceland First Seen’, the Liberty design team travelled to Iceland on an exploration of the senses in search of their own ‘Earthly Paradise’. A sense of sight, the most complex of all the senses, is what took the team there. 'Iceland first seen' was written by Morris depicting his feelings for this wild Northern landscape, a fitting title for a series of designs inspired by sight.  Ranga shows a townscape of hand painted Icelandic buildings. 

The Malvarosa is a lovely simple pull on (no buttons, no zipper yay!) dress in either short or 3/4 sleeves.  For this version, I' chose the short sleeves, but I'm keen to give the longer sleeves a go. The sleeves on this are very cute and have a sweet little built in 'cap' which is part of the bodice pattern.
Malvarosa Dress in Liberty of London Ranga
I made up the 36 but thought the armscye was too big so ended up taking it in down the sides just over an inch rather than the 5/8 " seam which helped reduce the gaping.  You can see that it is still a little bit gapey, but is ok.  The way the dress makes up means that this type of adjustment is super easy as the skirt is added and then the side seams are sewn.

Both the neck and arms are finished with facing.  I put in a few stitches to hold them down as there is a risk that they flap out.
Malvarosa Dress in Liberty of London Ranga
Lastly the pockets in the skirt are a really cute feature. I feel like mine might be hanging a little bit - so next time I make it up I'll make sure when I attach the pockets I will keep skirt piece firm. I also wasn't sure how to finish the seam nicely at the skirt attachment. I ended up overlocking the pocket tops (once they were sewn onto the skirt top and then overlocking the whole thing once the pockets and skirt were attached.
 Malvarosa Dress in Liberty of London Ranga
I'm just looking now for some lovely hot summer days as this will be a perfect Summer dress and the unexpectedly Christmas-y fabric will definitely make it a perfect Christmas dress.
    Malvarosa Dress in Liberty of London Ranga

In the works - A Malvarosa dress

Have you seen the latest pattern by Pauline Alice, the Malvarosa DRess?  She was inspired by the babydoll dresses by Balenciaga.  Oh, it is such a cute pattern and one that looks nice and easy and straightforward with no complicated closures. And just check out those hidden pockets in the skirt!

I've just cut out the sleeveless version in Liberty Ranga A from the Liberty Art Fabrics Collection AW 13 Seen.  This fabric is unexpectedly Christmasy so it might turn out to be a perfect Christmas lunch dress... nice and loose:)

I agree with Kathryn that cutting out really is the worst part of a project.  But it's done and now I'm on to the fun part. 
#sewliberty

It will be so nice to be back sewing in Liberty after two jersey projects.  Jersey really isn't my favourite fabric.  I may have also bought some more Liberty on Sunday from Tessuti... woops!